ENFORCE – Making the future of beekeeping sustainable

Trebag Ltd won a grant for the project under the Erasmus+ 2023 Call for Proposals scheme in a consortium led by the Kislépték Association.
The ENFORCE project, funded by the Erasmus+ programme, aims to support the sustainability of the beekeeping sector in the face of climate change, anthropogenic stress factors and marketing challenges.
Pollination by honey bees is not only essential for beekeeping, but also plays a vital role in agriculture, food production and the global health of ecosystems.
Objectives:
- Adapting to climate change
- Reducing invasive species – new pathogens and predators.
- Adapt breeding practices to extreme weather events
- Addressing sectoral barriers
- Helping individual branding
Project products:
- Online training material
- Beekeeping guide
- Methodological exercises for experiential farm development Training
More information: Honey experience website and on
Facebook
INPACT – Integrated plant protection as an answer for climate change

Due to the weather anomalies caused by global warming and the newly emerging invasive pests cause more and more worrisome problems for the farmers. The general objective of the project is to generate answers to the latest and most crucial questions of farmers which determine their cost structure, the accessible profit and food safety, while decreases the use of pesticides. We hope that the material written by professionals of the international consortium will be a useful help for the agricultural sector.
The main results of the projects are the following:
- Research about the partner countries’ agronomic and digital state
- e-Learning material on plant cultures: pepper, stone fruits, cucumber, cabbage, and root crops
- Online platform: https://www.inpactproject.eu/en/
In the last decade, knowledge and innovation transfer became essential for farmers to make decisions as quickly as possible in order to avoid financial losses, access markets, prevent plantations and livestock, and mitigate risks of climate change, such as storms, frostbite and draught. The project focuses on vegetable and fruit production, as climate change affects this sector the most gravely. The project will also contribute to developing the knowledge of the target group on environmentally friendly plant protection methods to reduce the use of pesticides. We collected the partner countries’ best practices to put them in easy-to-understand and well-constructed learning materials. The plant health of tomatoes, pepper, stone fruits, cucumber, cabbage, and root crops will be detailed in our training material. The project is funded by the European Union.
See you next summer on the e-learning platform!
Follow our facebook page to be up to date on the project: https://www.facebook.com/InpactErasmusPlus!
ITFARM

There is a consensus in the farming community that feeding a population expected to grow by an additional two billion people by 2050 will require solutions that rely on the innovative use of information and communication technologies (ICT). The term commonly used to describe the use of technological developments in agriculture is “Agriculture 4.0”, also known as the fourth agricultural revolution.
The term “Agriculture 4.0” can also be replaced by terms such as “smart agriculture”, “digital farming”, “digital agriculture”, ICT4AG, “precision agriculture” or “smart agriculture”.
The ITFARM project will aim at training family farm entrepreneurs to respond to the challenges of Agriculture 4.0, based on the integrated digitisation of entrepreneurial agricultural processes.
Development of Green Skills for Better Employability

DEGREBE project is funded by Erasmus+ that aims to help young students and professionals in the agricultural sector develop their green and transversal skills, because these skills are getting be more and more important in the labour market.
The project lasts 30 months and an international partnership is working on its implementation.
The project team:
- TREBAG Intellectual Property- and Project Manager Ltd. (Hungary)
- Idec (Greece)
- DEKAPLUS Business Services Ltd. (Cyprus)
- Czech University of Life Science Prague (Czech Republic)
- Cluster of Knowledge Sofia City (Bulgaria)
- Kislépték (Hungary)
During the 2,5 years, an innovative and digital educational material for trainers in agricultural topics and young people coming from the Gen Z will be created.
The first result will be an online visual novel for students and young professionals. The learners will be able to make their own choices to progress with the story, while exploring the world of DEGREBE and becoming more and more familiar with the concepts of green and transversal skills.
The second result is going to be a Training Guidebook for teachers. The manual will explore the idea of gamification, and how this methodology can be applied by teachers in their own classrooms.
(2021-1-HU01-KA220-VET-000024924)


SustainAgri – Sustainable Agripreneurship

The SustainAgri project takes a more practical approach to sustainable agriculture through a methodology that is tailored to the needs of the target group.
The main goals of the project are:
- Strengthening the competitiveness of the agricultural sector by “introducing” young farmers into sustainable agriculture
- Encouraging young people to start and work in agricultural enterprises
- Link sustainability to farm profitability, showing how the application of new technologies (smart farming) and management practices can reduce environmental impacts and increase profitability
- Demonstrate the important role of vocational training in the development of a new type of sustainable agricultural enterprise
- Increasing the social and environmental responsibility of rural communities
- Support transnational cooperation between the widest possible range of actors in the agricultural sector in order to make better use of sustainable management
An international consortium is working together to implement the project. The consortium members are: CULS (Czech Republic), DEKAPLUS (Cyprus), TREBAG Ltd. (Hungary), YES (Italy), ETA (United Kingdom), INNOVED (Greece), 8D-GAMES (Netherlands)
The project is co-funded by the Erasmus + program of the European Union.
SustainAgri – Sustainable Agripreneurship (2020-1-CZ01-KA202-078268)
Documents
Rural Facilitator

The purpose of Rural Facilitator Training in Agricultural Short Food Supply Chains project (funded by the European Commission, Erasmus +, KA2) is to provide a better understanding of the working SHORT FOOD SUPPLY CHAIN (SFSC) ecosystem in the partner EU countries at national and European level. This partnership consists of the partner organizations in the Czech Republic, France, Hungary, Poland, and Romania.
The main field of the project is short food supply chain (SFSC) development which is one of the most relevant factors as well as a tool of European food cultural heritage maintenance. The development of short food chains contributes to the preservation of traditional food and rural lifestyle related knowledge which mean the diversification of European culture. Short food chains offer opportunity to transfer traditional knowledge of food production in an innovative way. Experts agreed that it is necessary to start a special SFSC organizer training and to develop special eligibility conditions, as well as the training of SFSC advisers, however, these development and support directions are still missing in practice. Therefore, the partnership committed to explore the possible ways on how to generate the position of a so-called Rural facilitator and to develop the necessary learning materials and training tools to train individuals who intend to take under this new profession in their career. The outcomes of the project will provide an innovative teaching approach where organisers can partake from capacity building which will strong economic impact on successful value chain organisation and rural employment development.
Documents
NATFRUIT
In the countries of the European Union, pear growers and consumers have focused on the production and consumption of products that are produced without the use of chemical inputs and that do not harm the environment or people. Healthy and natural nutrition and growing without chemicals adds value to the market.
There are 13 pear species considered for cultivation, one of the important ones being P. communis L. This pear species is widespread throughout Europe and produces high quality fruit. The biggest problem in the Akyurt region is the decline in pear yields.
The project aims to exchange best ecological practices in Europe and in Turkey, Slovenia, Spain and Hungary.
The project also aims to support training of participants and other related activities aimed at acquiring and using knowledge, skills and qualifications to promote personal development, employability and participation in the European labour market.
The primary target group of the project are farmers involved in the production, marketing and sale of local and organic fruit products, in particular pears. The project will significantly improve their access to training and increase their skills in marketing, helping them to be competitive in Turkey.
An online training tool has been developed, which is modular and develops the professional knowledge of organic pear growers.
The project involves 4 countries (Turkey, Slovenia, Spain and Hungary) and 6 organisations.
The Apprenticeship HUB project in the agri-food sector

The Apprenticeship HUB project aims to create partnerships between small agri-food businesses and VET providers. These partnerships are facilitated by Apprenticeship Hubs, which operate through local development agencies, agricultural cooperatives, chambers of commerce, social partners and similar organisations. Project website: https://www.apprenticeshiphub.eu/ Follow us on FB: https://www.facebook.com/ApprenticeshipHUBs/.
The Apprenticeship HUB project aims to create partnerships between small agri-food businesses and VET providers. These partnerships are facilitated by Apprenticeship Hubs, which operate through local development agencies, agricultural cooperatives, chambers of commerce, social partners and similar organisations.
Programme: Erasmus+
Main applicant: Zadar County Rural Development Agency (AGRRA)
Project duration: 31 December 2018 – 30 December 2020.
Project budget: 177 986,00 €
Partners:
- PPVS Ozanic (HR)
- IDEC SA (GR)
- IN.A.S.O.-PASEGES (GR)
- Tuscany Region (IT)
- TREBAG (HU)
- HCPP (HU)
Taget groups:
- Support staff who liaise between VET providers and agricultural enterprises in the field of practical training.
- Agricultural VET providers, including vocational schools providing lower and upper secondary education, higher education centres providing initial vocational education or training, chambers of agriculture, local or regional authorities and other stakeholders providing training in agriculture
- Farms and small and micro enterprises in the food industry
- Students in vocational training in agriculture
A short presentation of the project:
The aim of the project is to improve employment opportunities for apprentices and graduates and to increase the value of the skills acquired for the needs of small farms by involving agricultural SMEs in practical training programmes. The proposed development of work-based learning and apprenticeships will be achieved through the implementation of 4 specific objectives:
- Increase the number of high-quality apprenticeships in the agri-food sector by involving small farms and small food businesses in apprenticeship programmes;
- to develop sustainable partnerships between VET institutions and employers/farmers at local and national level;
- increasing the capacity of VET institutions to organise and deliver apprenticeships;
- to increase mobility within the country and the number of apprenticeships in agriculture for apprentices.
By achieving the above objectives, the project will contribute to:
- raising awareness among SMEs in the agri-food sector of the benefits of participating in apprenticeships, both for the business and for society;
- increasing the capacity of those involved in apprenticeships (farmers, employers and training centres) through targeted activities, methods and tools;
- networking among stakeholders through local and European partnerships between VET providers and enterprises, web platforms and social media.
The project specifically proposes the creation of Practical Training Centres for the agriculture and food industry. The aim of the Centres is to support work-based learning for students in vocational training in agriculture and food by creating opportunities for apprenticeships in small and medium-sized enterprises, cooperatives and relevant industries in the agri-food sector. Supporting apprenticeships in the network of small and medium-sized agri-food enterprises will benefit apprentices by providing them with the knowledge and skills needed in the labour market and thus giving them a smooth start to their professional careers. The positive effects will also be felt in agriculture and the food industry, as SMEs in the sector will benefit from the knowledge, youthful attitude, work ethic and development needs of apprentices, their flexibility to adapt to the needs of businesses and their lower wage requirements. The selection and matching of trainees with SMEs in the sector is very important in this respect, and this is the work of the Centres. The benefit to the vocational training schools from supporting apprenticeship training programmes is the opportunity to improve the training programmes based on feedback from SMEs and trainees.
The project website: https://www.apprenticeshiphub.eu/
Follow us on Facebookon too.
PLENTIS – Play&Learn Entrepreneurial Skills in the Agricultural Sector

The PLENTIS project aims to help students learn and teachers teach in a playful way. The 7-member partnership has developed an online educational game to develop the entrepreneurial skills of young farmers, called AGROPOLY, which will be available for testing in English from autumn 2015. The Hungarian version will be available from early 2016.
The main outcome of the PLENTIS project is the online game-based educational platform Agropoly, a virtual space that combines the fun of playing with the usefulness of learning entrepreneurial skills for students in the agricultural sector. If these students are open-minded or already planning to start their own business in the future, the platform will give them a taste of the real-life situations involved and the competences they need to develop to achieve their goals.
Players are rewarded with points for their performance. The points can then be used to buy buildings, various landmarks and then place them on the (initially) abandoned piece of land. This will personalise the area under development by the player. Players can compare their results with each other using these buildings.
At http://plentis.eu/ it is also possible to register for the test site.
On Facebook, we keep you informed and share pictures of development activities.
AGROSKILL – Transferring methods for validation of informal learning to VET institutions in the field of sustainable agriculture
Agroskill focuses in the agriculture field, and the project objectives are to transfer innovative trainings methods, to exchange results and to agree best available methodologies in the field of non-formal and “informal” training, namely outside the field of school and university curricula (like vocational training). The project started in October 2013 and the activities are expected to cover 2 years until September 2015, and the costs are 75% funded by the Leonardo da Vinci program. Agroskill is composed by a consortium of 9 partners from 8 EU countries: Austria; Croatia; France; Greece; Hungary; Poland; Spain and Germany with large experience in relation with training and sustainable agriculture (especially organic farming).
Agroskill focuses in the agriculture field, and the project objectives are to transfer innovative trainings methods, to exchange results and to agree best available methodologies in the field of non-formal and “informal” training, namely outside the field of school and university curricula (like vocational training). Therefore, the aim is to achieve common frameworks for recognition at the European level.
Some of the foreseen activities of the projects are: the transference of best practices in sustainable agriculture and skills validation; to develop pilot training courses involving more 35 experts and teachers of vocational training; the establishment of a European network of experts, comprising at least 65 skilled and 100 vocational training centres; to broadcast online training programs.
Further informations could be found on the project website: http://agroskill.eu/, or contact us at TREBAG Ltd. on the following e-mails: andrea.kovesd@trebag.hu or monika.varnai@trebag.hu.
Documents
PlantPro – Training material on plant protection

This project was implemented in 2002-2005, within the frames of the European Commission’s Leonardo Programme, with the aim of developing an updated plant protection training material mainly for family farming companies. The partners are represented from five different countries: Czech Republic, Slovakia, Spain, Greece and Hungary. The Coordinator of the project was the Hungarian Trebag Ltd. During the project the integrated plat protection training material of 14 plants had been developed, giving a detailed description of the plant pathogens, the different weeds and the traditional prevention methods against them.
Complex plant protection material for farmers
The crucial point of the modern farming is the timely prevention against pathogens and pests. The recent changes in the weather system caused the appearance of such parasites, which were unknown before in the country.
The complex plant protection material was uploaded in the knowledge base of the project, describing the pathogens, pests (viruses, bacteria, fungi) and weeds. The material is available online, where a quick search function helps to identify the actual parasite.
The following 14 plants can be found in the training material: wheat, spring barley, tomato, corn, sunflower, melons, root vegetables, cole crops, sweet peppers, tomatoes, cucumbers, apples, stone fruits and grape.
You may find further information regarding plant protection of other plants on the http://www.plantprotection.hu/index.htm webpage.
Documents
EcoPlanta – Upgrading skills and competencies in the organic plant protection
The ecoplanta project is a 24-month initiative co-funded by the European Commission, under the Directorate-General for Education and Culture. The project aims to improve and upgrade skills and competences for farmers and agricultural workers in the field of organic plant protection. This will be achieved by transferring the innovative training material from the highly successful LdV PLANTPRO project to vocational trainers, through whom farmers and agricultural workers can benefit and acquire skills and competencies in organic plant protection. Additionally, ecoplanta will support the creation of green jobs by assisting farmers on the path to organic agriculture and/or by improving their employability, while promoting environmental friendly land use and agriculture.
Ecoplanta rationale
The application of agrochemicals for controlling pests and diseases is forbidden in organic agriculture, making crop protection a constant challenge for farmers and agricultural workers. The ecoplanta partnership has identified this clear need to enhance and upgrade farmers’ competences and provide them with training material and key guidelines in order to help them adopt organic farming principles and to meet the increasing, both at a European level and globally, consumer demands. The targeted countries are Greece, Poland, Hungary and Romania, which are among the EU member states that face negative employment growth, large agricultural sectors and low GDP. At the same time, the employment situation in the agricultural sector in EU27 is changing rapidly and is becoming more competitive over the last decade. Considering these facts, it is clearly needed that VET in agriculture becomes more responsive to the labour market needs.
Ecoplanta aims
- Improve low-skilled farmers and agricultural workers’ basic skills in organic pest and disease control
- Enable low-skilled farmers and agricultural workers to take advantage of opportunities that better their position in the labour market
- Make VET in the agriculture more responsive to labour market needs
- Provide VET trainers with adequate innovative tools and resources –in terms of methodology- to address the needs of farmers and agricultural workers
Ecoplanters
Ecoplanta has been developed by a transnational consortium of six expert actors with complementary skills and expertise in Organic Farming, Research, Training, Business and Consulting from five EU member states i.e. Romania, Greece, Switzerland, Hungary and Poland.
Project Leader
Mezőgazdasági– és Iparkamara Arad, Románia
Partnerek
Arad Chamber of Commerce Industry and Agriculture, Romania
Partners
Militos Emerging Technologies and Services, Greece
- Research Institute of Organic Agriculture, Switzerland
- Trebag Property and Project Management LTD, Hungary
- C.V.T. Georgikis Anaptixis, Greece
- BD Center, Poland
Homepage: http://ecoplanta.eu/hu/
Agrotrain – Knowledge on Organic Farming

Organic farming shows a growing tendency regarding the importance in agricultural production, both in Europe and countries outside Europe. This project summarized the basic knowledge about organic farming. Organic farming is the re-thinking of our own environment and of the future generation, the most popular modern version of sustainable agriculture. The Agricultural University of Plovdiv, The Agricultural Training Centre of Greece, the Turkish Erbil Ltd, the Spanish FTT and AELV organic farming companies and the Hungarian Trebag Ltd participated in the development of this training material.
Guidance to Organic Production
According to WFO the definition of organic farming is: a holistic production organising system which facilitates and increases the good condition of the agro- ecosystems, such as biodiversity, the cycle of the soil’s organic material content, and the soil’s organic life.
Historical Overview
Rudolf Steiner (1861-1925), Austrian scientist and philosopher was the founder of the ecological farming in Europe. He started to give lectures in 1924 to a group of farmers in Silesia (in Poland today) about biodynamic farming. The ecological farming developed in the 30’s and 40’s of the 20th century in Switzerland, UK, and Japan. It turned into an independent organized movement in the 70’s, when the International Federation of organic Agricultural Movement (IFOAM) was established in Paris in 1972.
Legislation
On the 1st of January 2009 legislations about producing, assessing and labelling ecological products came into force.
In July 2007, the European Council of Ministers of Agriculture decided to accept a new council regulation regarding the production and labelling of ecological products. This new regulation contains aims, principles and rules clearly describing the ecological production.
Documents
HERBS – Training material of herbs supporting agricultural SME-s

The training material consist of modules detailing the cultivation technology of herbal plants. 10 modules are the same for all participating countries, and additional 5 herbal plant modules are detailing plants specific for the partner country. The materials are neriched with supporting videos. Moreover the material also contains 5 modules introducing general knowledge regarding processing, storage, essential oil extract of herbs, etc.
Please visit the project webpage for more information: http://www.herb-education.eu/
Chapters
Fennel Cultivation
Medicinal plants, these “green wizards, flower remedies”, are man’s most ancient remedies, and their use dates back to the earliest human cultures. It is probable that prehistoric man also discovered plants with healing properties while searching for food. In these societies, the knowledge of healing, the ‘magic power’ of plants, the ability to cure illness and restore health – knowledge that implied a certain superior power. In possession of this power, the healer was respected as a chosen person, the science of healing itself was religiously respected, linked to beliefs and rituals, and the role of healers went far beyond treating sick people.
There are written records of the knowledge of medicinal plants and healing traditions of the great civilisations of antiquity. They tell us what plants were known and how they were used to maintain health and cure illnesses. The medicinal properties of plants were used in a wide variety of ways: eaten raw, soaked in water, wine, vinegar or oil, boiled, put in bath water, mixed with flour, bran, honey, applied as poultices or as ointments. Since ancient times, plants with a strong, balsamic fragrance have played a special role. The fragrance, which wafts upwards, mediating between earth and sky, was initially of great importance in cult rituals as incense. The resin of the frankincense, myrrh and balsam trees was considered in ancient times to be the ‘seat of divine power’ and was anointed on kings and princes, because it was through the balsam ointment that they received the divine power to rule. A curious archaeological find was unearthed during the excavation of the early Indus Valley culture: terracotta stills for extracting essential oils and jars for storing perfumes. The extraction of fragrance by distillation, as the ‘innermost essence’ of the plant, has always been part of the secret knowledge. Essential oils and the perfumes and ointments made from them have been among the most expensive medicines and perfumes.

Perhaps the earliest evidence of the history of medicine is found in Babylonian clay tablets from 5000 years ago, which show scenes of healing; 4000 years ago in China, pepper and cinnamon were already known to have beneficial effects, and mandrake, rhubarb root and garlic were among the main medicinal herbs. Soon afterwards, a 52-volume work was published detailing the medicinal uses of nearly 1,000 plants. Ayurveda, India’s ancient healing system, has also been promoting the importance of medicinal plants for thousands of years. For the ancient Egyptians, healing with plants was an important part of therapy, including baths, ablutions and cleansing cures. The so-called Ebers papyrus scrolls, which contain 800 different recipes with descriptions of 100 medicinal plants, tell us about the medical knowledge of Egypt 3 500 years ago. Some of the herbs known at that time are still used today, such as horsetail, cumin, linseed, garlic, thyme – plants that were essential for embalming corpses. Here too, medical practice and magic were intertwined, since the purpose of embalming was to prepare for eternity.
There are written records of the knowledge of medicinal plants and healing traditions of the great civilisations of antiquity. They tell us what plants were known and how they were used to maintain health and cure illnesses. The medicinal properties of plants were used in a wide variety of ways: eaten raw, soaked in water, wine, vinegar or oil, boiled, put in bath water, mixed with flour, bran, honey, applied as poultices or as ointments. Since ancient times, plants with a strong, balsamic fragrance have played a special role. The fragrance, which wafts upwards, mediating between earth and sky, was initially of great importance in cult rituals as incense. The resin of the frankincense, myrrh and balsam trees was considered in ancient times to be the ‘seat of divine power’ and was anointed on kings and princes, because it was through the balsam ointment that they received the divine power to rule. A curious archaeological find was unearthed during the excavation of the early Indus Valley culture: terracotta stills for extracting essential oils and jars for storing perfumes. The extraction of fragrance by distillation, as the ‘innermost essence’ of the plant, has always been part of the secret knowledge. Essential oils and the perfumes and ointments made from them have been among the most expensive medicines and perfumes.
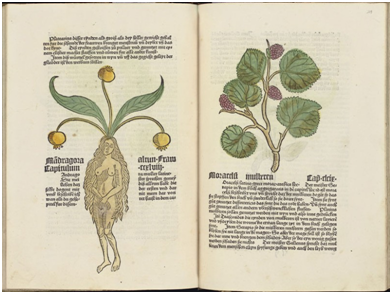
In the centuries of human migration that followed the decline of the Roman Empire and the rise of Christianity, human culture in Europe, science, the arts and botany, continued to live on in the early Christian monasteries. The monasteries served both to preserve and revive old knowledge and to receive and disseminate new knowledge. The monks, often themselves learned priests, practised medicine, teaching and the arts alongside their religious life. By copying the great works of antiquity, translating and reproducing the Greek-language codices into Latin, they preserved these treasures for posterity. The botanical works of Dioscorides, copied in large numbers, had a major influence on the later herbals that were already in print. Plants for medicinal purposes were cultivated in monastery gardens, and medicinal preparations and tea mixtures were also produced. The plants in monastery gardens were essentially the product of ancient garden culture. Although the villa gardens were destroyed, their useful plants survived in the village gardens of Italy, as did the folk knowledge that, together with the ancient sciences and the monks’ experience of healing, made up monastic medicine. The Capitulare de villis, a royal decree attributed to Charlemagne, but probably drafted by a learned Benedictine monk, dates from the late 8th century and contains the most complete list of plants for monastic gardens. (This list of plants is also a source of information on the plant material of the early monastic gardens in Hungary, since the life and activities of the Benedictine monks who settled on Mount St. Martin in 996 were basically the same as those of their Western counterparts.) Many new plants have also been introduced, knowledge of which comes from the expanding Arabs. In the 12th century, St Hildegard (1098-1179), a monastic abbess and mystical visionary, summarised her knowledge of nature and healing in her encyclopaedic work Physica, which contains numerous herbal recipes that have been rediscovered today. Gutenberg’s invention, the printing of books (1452), was a huge boost in the dissemination of knowledge. Most of them are richly illustrated with painted woodcuts. In 1500, Hieronymus Brunschwig’s book on the art of distillation was published, in which he describes essential oils in detail, how they are extracted, the means of distillation and the use of “waters of life”, aqua vitae, made from various plant distillates. The 16th century abounds in the expansion of knowledge about medicinal plants: in the first half, Paracelsus (1493-1541), who created the foundations of modern medicinal use, was active, and whose completely new medical approach and healing activity can be related to the basic principles of today’s naturopathy. He realized, among other things, that the same plant drug, which is medicine in small doses, can also be poison in large doses – the healing or toxic effect of a substance depends on the dose. Hieronymus Bock, the “father of medicinal herbs”, was also active at that time, and in his illustrated book published in 1546, he detailed German herbs and their medical benefits. Lonicerus’ herb book (1555) was also a forerunner of the first Hungarian herbarium, and in his book published in 1571, Mattiolus describes a large number of almost 1000 herbs and their uses. The person of Carolus Clusius is particularly important to us, as he was the first to research and in his work published in 1583, containing 1,146 woodcuts, he was the first to describe the flora of Hungary. Clusius’ flora research brought something new in the history of botany, since until then plants were basically examined and described from the point of view of their usefulness, above all, their medicinal effect. In the 17th century, the work of an English botanist, Nicholas Culpeper, published in 1653, Complete Herbal, greatly upset the mood of the medical community, as it published information about the use of medicinal plants that until then could only be known to a narrow, initiated stratum. By the way, this book still holds up in many respects today. In the 18th century, the natural sciences underwent a huge change, and that’s when Karl von Linné, a Swedish physician (1707-1778), created his new systematics that covers the entire living world, the binominal nomenclature. Our current knowledge of the medicinal effects of plants was based on the research work carried out in the 19th century by Claude Bernard (1813-1878), a French physiologist, with animal experiments – he was the first to prove the effect of a host of plant substances on living organisms, thus creating the basis for active ingredient research. At that time, artificial substances also appeared in medicine, including countless new, synthetic compounds that do not exist in nature, “immediately effective” pain relievers, sedatives, and sleeping pills. By the 20th century, further research into plant active ingredients accelerated, the clarification of their mechanism of action and the chemical production of active ingredients resulted in countless new medicines.
Valuable information about the knowledge of the Hungarians about medicinal plants can be found in the works researching Hungarian ancient religion, so the names of wormwood, elderberry, elderberry and the legends associated with them, which have been alive in the folk beliefs for centuries, prove how respected these plants were among our ancestors. Folk knowledge of plants has been passed down, accumulated and diminished through oral tradition, and although fragments of it still exist in the Carpathian Basin today. The first list of Hungarian medicinal plants is found in the so-called Pray Codex, which dates back to the turn of the 12th and 13th centuries and contains 27 plant names, including fennel, sage, mint, hyssop, button-wort and mustard. The list also mentions food plants, and even ginger, rhubarb, pepper and cinnamon from far-off lands as monastic plants.
It is probable that certain families of plants, such as lipwort, were also introduced into the gardens of monasteries and noble mansions at this time.
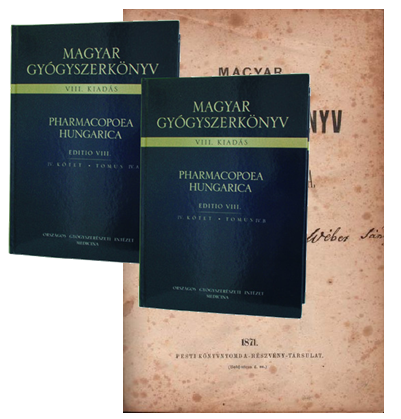
The first Hungarian-language natural history handbook, Herbarium by Péter Melius, was published in 1578 in Cluj-Napoca, by the widowed Gáspárné Heltai. “It contains about 50% of the medicinal plants then considered important in Central Europe, both wild and cultivated, foreign, apothecary plants. Another book, Ars Medica (The Art of Medicine), by György Lencsés, was written at the same time, and for centuries it preserved the knowledge of medicine in manuscript form, unpublished. The 16th century saw the beginning of professional medicine in our country, which did not differ much from the practice and basic materials of folk medicine in the materials, roles and procedures used – which were predominantly of plant origin. The Pax corporis, the first truly influential Hungarian medical book, was published more than 100 years later in 1690 by Francis of Pope, and is considered to be the first medicinal and medical substitute for the ‘ailments of the human body’. As the author himself wrote, his book was not intended for scholars, but for the ‘comfort of the servant farmers and farmers’ wives and the poor, the poor, the many bitterly groaning sick’. The Posoni Garden, a massive volume published by János Lippay in 1664, in which the author describes the abundant description of herbs, their benefits and their healing powers, still encourages gardening, “messing” with flowers, seedlings and trees. “The garden is a treasure to be treasured”, he writes, in which the flowers and herbs “with their healing powers bring back our health, which has been lost through illness, they preserve and guard it incessantly”. The herbal books published in the 18th century served to better understand and identify plants, and in addition to their various medicinal uses, they contain a wealth of useful ethnobotanical data. (Diószegi-Fazekas: Hungarian Herb Book, József Csapó: Hungarian Garden with Grass and Flowers, Antal Veszelszki: Forest and Field Collection, the botanical work of József Benkő, who was the first to use the double nomenclature of Linne, while Pál Kitaibel described nearly 150 plants unknown to science until then.)In 1871, the first Hungarian Pharmacopoeia was published, an official publication detailing the quality requirements for the production of medicines, the rules of control and quality standards, which is binding for all pharmaceutical manufacturers, pharmacists and doctors. By the 19th century, more and more emphasis was placed on the study and research of local flora, which was a prerequisite for research into medicinal plants. By the beginning of the 20th century, Hungary was at the forefront of medicinal plant research: in 1904, the world’s first experimental station for medicinal plant research was established in Cluj Napoca, led by Béla Páter. Together with Elemér Kopp, they also initiated research into plant chemistry and the development of cultivation technology for 80 plant species. However, it was only in the years after the First World War that medicinal plants were cultivated on a larger scale in Hungary, as the increased shortage of medicines again focused attention on medicinal plants. In 1915, the Herbal Experimental Station was established in Budapest to control the collection and cultivation. The Herbal Experimental Station was the base on which Hungary became a “herbal power”. As a result of this development, it was during this period that János Kabay developed the production of morphine from dry mats. The 1920s also saw the emergence of domestic essential oil production. It was then that English and French lavender and peppermint were introduced and large quantities of essential oils were produced from them. Hungarian chamomile became famous as a wild-collected herb.
The shortage of medicines and tea in World War II brought a new boom in research into medicinal plants and the development of cultivation and processing. The value of wild medicinal plants also increased. A typical ‘war herb’ is the wild blackberry, whose leaves are used to make tea with a fragrance and flavour reminiscent of real tea, and whose tannins and mild physiological effects made it a substitute for black tea, which was already being collected during the First World War.
By the end of the 1980s, the area under medicinal plants in Hungary was 37-42 thousand hectares. Today, it is estimated that this area has been reduced to 20-25 thousand hectares, despite the fact that the demand for medicinal plants and their products has increased worldwide! Hungary has excellent growing conditions and a centuries-old tradition of cultivation, and medicinal herbs from Hungary are of outstanding quality on the international market. Nowadays, our everyday medicinal plants are playing an increasingly important role in health preservation and disease prevention. There is almost no disease that is not helped at some stage by one or another plant! The truth of the old adage: “in grass and in trees…” is becoming more and more apparent.
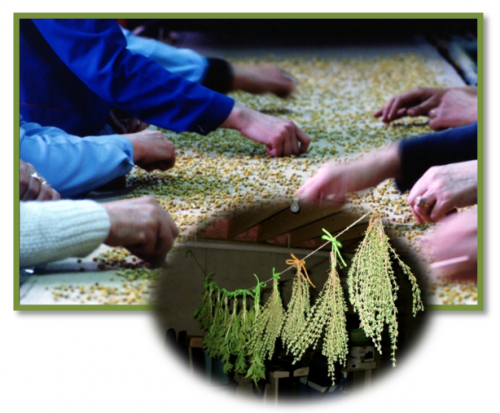
Drying and cleaning
The most valuable products can be gained from the parts of herbs containing the highest amount of active agents. To increase the quality and value as high as possible it is important to harvest the herbs when they contain the most active agents. This time is only overlapping with the time of biological maturation of fruits and seeds in case of only a few plants. At the majority of herbs the accumulation of the active agents happens in the time of blooming, in case of parts underground this time is around the end of the growing season. In such cases the harvest should not happen in the time of biological but of technological maturation. The moisture content of the harvested plant particles (leaves, shoots, flowers, roots), and cannot be stored even not temporarily without any damage. Thus the harvested plant particles should be made suitable for storage, and prevent the harmful biological processes (molding, dry tipburning etc.), so it should be conserved somehow. The first step of conservation (drying9 should be performed by the farmer.
Drying of Medicinal Plants
Basic criteria for drying medicinal plants:
Harvested plant parts (roots, shoots, fruits, inflorescences) usually have high water content, corresponding to about 60-80%. If this water content is not reduced significantly, it will promote adverse biological processes (reproduction of bacteria, browning, molding). As a result, valuable active ingredients may be destroyed and organoleptic properties (colour, odour taste) may deteriorate. Reducing water content as fast as possible to prevent such harmful processes is a basic requirement.
A significant proportion of herbal drugs is used directly (as teas, spices, etc.), so drying should preserve not only active ingredients but also organoleptic properties. The drying process should be cost effective as well. Medicinal plants should be dried in a way that the eventual water content of drugs does not exceed 10-14%. With such water content, the majority of drugs may be stored for longer periods without any adverse changes in quality. Overdrying is not only harmful but also uneconomical.
Preparations for the drying process:
Harvested green plant parts should be prepared for drying to improve the efficiency of the drying process.
a.) Cleaning: Unwanted or harmful material should be removed. These include foreign plants, foreign plant parts, soil, mud, sand. Cleaning is performed by hand, screening or washing (e.g. Angelica radix, Valerianae rizoma). In some cases, the outer layers not containing active ingredients are peeled from the roots (e.g. Althaeae radix).
b.) Shredding: Large, thick plant parts are prepared by shredding, with special regard to roots.
c.) Removing leaves: Leaves are removed from the freshly harvested leafy shoots. Good quality leaf drug (folium) may be produced only if leaves are removed before drying (e.g.Melissae folium). Producing leaf drugs is highly labor intensive so it is done less and less often.
Drying methods and equipment:
In practice, natural and artificial drying methods are used. The methods of artificial drying are classified according to the temperature of air as cold air drying, warm air drying and hot air drying.
a.) Natural drying:
The method has been used since ancient times. The easiest way to do it is solar drying. Unfortunately, it is affected by the weather (sudden rain, windstorms, etc.) To prevent damage caused by weather, we can use well ventilated barns, granaries or attics but in this case drying requires lots of space. If the layer of herbs to be dried is too thick, the plant material should be turned often. For better utilization of space and to accelerate the process, plants or plant parts are placed on drying frames. It also improves the quality of the drug. Air moves freely between the drying frames that are placed over each other. About 0.5 kg of inflorescences, 1-2 kg of leafy shoots or 2-2.5 kg of roots may be dried on 1 m2. The spread herbal layer should be turned occasionally as it may absorb water from the air in wet weather.
b.) Artificial drying: When using artificial drying, the duration of the process may be reduced to a few hours. In artificial drying, air is heated and its humidity is reduced by ventilation.
1. Cold air drying:
In this case, the air current used for drying is regulated only. The air current is maintained by ventilators. Ventilators may be used in dry and hot weather only. The quality of the drug will be better if cold air drying is performed indoors. The duration of the drying process is 8-20 days depending on the water content of both the air current and the plant material to be dried.
A method that may represent an interim category between cold and warm air drying is active ventilation, using industrial grain driers and ventilated floors. In this case, not only the air current but also air temperature may be regulated (heating). The method is particularly suitable for drying fruits and seeds, but also for other plant parts
2. Warm air drying:
Medicinal plants are usually dried using this method. The plant material to be dried is placed into a closed system that facilitates ventilation with warm air (a special machine), i.e. it is not placed outside the air duct. Air temperature, humidity and flow velocity. The duration of the drying process is a few hours. In warm air drying processes, plant material and drying air usually move in opposite directions.
3. Hot air drying:
The method is most often used to conserve roughage plants. It may be used for the drying of medicinal plants in certain cases only (kangaroo apple, thorn apple, lesser periwinkle). The duration of the drying process is about 2-5 minutes.
Post-drying processes:
After drying, rugs should be formulated into products for wholesale and retail distribution. The processes applied here are sometimes called manipulation processes.
Post-drying processes most often applied:
1. Selection and cleaning: Foreign material (other plant parts, weeds, waste) should be manually separated.
2. Screening and aspiration: Classification according to size, mechanical cleaning.
3. Destemming: refers to the removal of stems longer than allowed in the case of certain flower drugs (e.g. chamomile). Most often it is done by specialised machinery.
4. Removing leaves and flowers: When drying marjoram, leaves and flowers have to be removed from the stems first. This is done manually or by special machines.
5. Cutting and milling: Cutting and milling are usually necessary to set the appropriate particle size for tea mixtures or other uses.
Cleaning Seeds
The propagation material of cultivated medicinal plants (seeds) should be produced in accordance with the relevant quality criteria (purity, germination capacity.) Only certified seeds (from sealed packages) may be used for propagation.
Cleaning seeds has a double function:
1. To provide for the purity of seeds (the propagation material may not contain seeds of other species or varieties or physical pollutants such as soil or plant particles).
2. To improve germination capacity (germination rate may be improved by removing empty hulls and damaged seeds)
Seed cleaning equipment and machines:
Sieves: Sieves separate seeds according to their dimensions. The types used are woven mesh and pate sieves. Sieves may have circular or rectangular holes or slots.
Winnowers: Seeds are separated according to their aerodynamic features. Winnower design may be based on suction, blowing or lateral blowing.
Seed graders: Seeds are separated according to their shape. Seed graders may apply cylindrical drums, disks.
Abraders and shredders: These are used to remove seeds from fruits as well as to remove leaves and inflorescences from stalk sections.
Separators: Seeds are separated according to their weight.
Horizontal and vertical conveyor belts: Seeds are separated according to their capacity to roll.
Magnetic separators: Seeds are separated according to their surface texture. Smooth seeds may be separated from those with an uneven surface; iron powder adheres to the latter ones.
Colour separators: Seeds are separated according to their colour.
Cleaning and Shredding Medicinal Plants
Separating belts: Facilitate faster manual separation of alien material from bulk herbs. They are 5-7 m long and 70-80 cm wide with an adjustable speed in the range of 1-10 m/min.
Cutting machines: they are used to cut the cleaned material to the designed size. The shape of the resulting particles may be „normal” or „cube” (e.g. cutting the roots of marshmallow into cubes).
Shredders: They are used to remove leaves and inflorescences from the dried leafy stalks (e.g. basil, marjoram).
Mills: They are used when very fine particles are needed thus cutting does not suffice. With grinding various particle sizes may be achieved. Several types of grinders are known, such as hammer mills, turbo mills, shredder mills and mills with pin discs.
Sieves: They are used to separate certain size fractions from the shredded (grinded) fresh or dry material; also to clean the material from sand or dust. They are also suitable for other purposes, for instance to remove the stalks of chamomile.
Seed graders: They are used when sieves are unable to achieve sufficient purity and the particles to be separated differ from those in the desired material in shape.
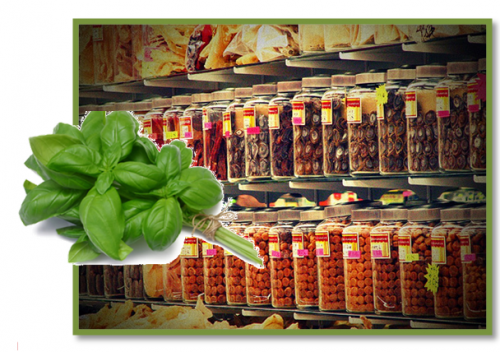
Storing and Packaging of Drugs
Following the drying process, drugs should be packaged and stored for some time (until transportation) in the production facility.
Storing: Drugs from dried medicinal plants may be stored in well ventilated, dry rooms only. Drugs are more or less hygroscopic (absorb water from their environment), their water content may increase significantly when stored under inappropriate conditions which in turn leads to significant quality deterioration.
Drugs may be used for medical treatments directly or after further processing so storerooms should be kept clean all the time and occasionally they should be disinfected, too. Drugs should be protected against rodents and insect pests.
Toxic drugs (deadly nightshade, thorn apple) should be isolated from other drugs and kept in a separate room. Drugs with a pungent odour (e.g. valerian) should be stored in a similar way so that their odour is not adapted by other drugs.
Storing essential oils:
In essential oils, adverse processes (decay, oxidation) may deteriorate quality during storing. These processes may be prevented by keeping storing temperature low and filling storing vessels to repletion. Essential oils should be kept in dark rooms, especially if they are kept in glass vessels.
When storing drugs and essential oils, accurate registry is of paramount importance. Stored drugs and essential oils should be labeled accurately, indicating volume, place of storage, date of harvest and time of filling the vessel.
Packaging
Packaging depends on:
- the nature of the drug (fruit, seed, root, leaf, flower, herba) -the volume — the method of ransport – transport distance
Drugs are packaged most often in bales, large and small bags (paper, ventilated plastic, jute), crates or boxes.
Drugs that may be pressed (these are mostly herba drugs) are packaged as bales. Bales are made by baling machines. Bales usually weigh 60-100 kg. Bales are wrapped in sacks (also of ventilated plastic) Drugs that cannot be pressed (roots, barks) are packaged in large bale sacks, which are then sewed in.
Drugs of large volume (fruits, seeds) should be packaged in sacks. Strongly hygroscopic drugs (flowers, hip, juniper) are usually packaged in paper bags. Valuable, fragile drugs (chamomile flower, mint leaves, lemon balm leaves) are packaged in wooden or cardboard boxes. Essential oils are kept in metal vessels, kettles or tanks. Small volumes of essential oils are best kept in glass vessels.

The essential oils can accumulate in the external oil-vessels of different parts of the plants such as leaves, flowers, seeds and roots. On room temperature these essential oils are generally in liquid state, have fine scent and can evaporate easily.
Essential oils can be extracted in many ways. The most known method is steam distillation.
Distillation: converting liquids into steam on their boiling point, and then converting them back to liquid with cooling. There are two main methods to distillate liquids:
Simple distillation: distillation of one phase liquids, or a mixture of more materials, that can be separated by their different temperature of boiling points.
Hidrodistillation (steam distillation): separation of immiscible liquids, usually with water and liquids not dissolving in water (e.g. essential oils). This is the method to extract essential oils with the help of water steam.
The method and equipment of essential oil distillation:
Preparatory procedures:
Most times, the aim of preparing the harvested plant particles is to make the essential oils available for the steam to reach. Before distillation the plant particles should be grinded for the purpose of better utilization of the distillation kettle. Grinding and shredding the roots, seeds etc, containing the oil vessels will serve the extraction of the oil. The scale of grinding depends on the plant particle and the instrument of distillation in question.
The process of distillation:
The essential oil distillation can happen in batch or continuous mode and in so called container distillation installations as well. The process and the steps are practically familiar. The most common is the batch mode of distillation.
A) Batch distillation process:
Main parts: steam boilers, distillation kettle, condenser, oil separator vessel.
The steam required for the distillation process can be produced separately from the installation itself, in an oil, coal or mixed-fuel boiler.
The distillation kettle has the shape of a standing cylinder or a truncated cone tapering downwards, made of metal (iron or copper usually). In Hungary the truncated cone shaped containers are in use with the payload capacity of 3-5 cubic meters average.
The loading of batch container can happen manually, with the help of a conveyor belt or sometimes with a hydraulic shovel with chopping in one round. The balanced distribution of the plant particles should be ensured during the process. The amount of plant particles that can be loaded in the container is determined by the moisture content, the scale of graining and compression.
B. Continuous distillation process:
The container part of this installation is usually a cylinder of 4-6 meters high, in which the plant particles move downwards, and the water steam is flowing upwards. the loading and unloading is continuous. The advantage of this method that the process can run continuously and it does not demand much living labour. The drawback is that this installation is not suitable for the inflorescence, fruits and roots.
Container Installation:
The container is basically a 4-6 meters long recumbent vessel on wheels, suitable for towing and can be connected to the harvester machine, therefore it can be directly loaded with the chopped plant particles. Once the container is fully loaded and sealed, a steam inlet tube and a moisture drainage tube can be connected. The essential oils can be extracted similarly to the batch method. About 150-250 kgs of plant material can be loaded per cubic meter.
The time needed for distillation is determined by the characteristics of the plant, the type of the container, the amount of steam and the speed of flow. To extract oils from the superficial oil vessels of the plant can happen quite fast, the oil from leaves and flowers either from fresh or dried stage can be extracted easily, in short time and with not too much steam. In case of internal oil vessels the process is longer.
The distillation process ends when the distillate from the condensator does not contain any essential oil. In practice the introduction of steam is terminated when there is no coherent layer of oil on the top of the distillate.
Cooling, separation:
The condenser (cooler) is usually built up of spiral tubes or tube bundles, commonly of copper, aluminium or stainless steel. The cooling is provided by water. Its efficiency is related to the surface of the cooling area, the temperature and amount of the water.
The clear essential oil can be separated from the mixture of essential oil and water dripping out from the condenser, in an installation called Florentine dish. the separation is based on the different density of these fluids. The smaller vessels are usually made of glass, the bigger ones of metal. Their way of operation and structure is different depending on the essential oil to be separated in them, is lighter or heavier than water.
In the distillate, the essential oil is seceding in the form of smaller and bigger droplets; these will traverse in water upwards or downwards according to their density. The sedimentation rate depends on the size of the droplets and the density difference between the oil and water.
After distillation:
The raw essential oil separated should be cleaned and filtered of the floating contaminants and water. In order to facilitate this process, it is expedient to do a preliminary sedimentation, because the contaminants are difficult to filter and can easily occlude the filter itself.
After the distillation, the essential oil free plant particles can be removed by turning the container upside down, or by dipping the material out. The continuously operating containers are emptied with an endless screw conveyor.
By using the essential oil free plant particles afterwards, the process of distillation can be more economic. The plant particles used in essential oil production (especially fruits) still contain valuable agents – e.g starch, lipids, and proteins – therefore can provide good quality fodder. In this case rapid drying and cooling process is required, because the hot and moist plant material can get infected and rotten quickly. The dried plant material can be used as refuse fuel as well. One of the handiest ways to use this plant material in question is to make compost out of it and use it as green manure later on.
Extracting essential oils by extrusion:
The essential oil of citruses (orange, lemon, tangerine) are really sensitive, can be damaged around 100 degree Celsius, therefore good quality oil cannot be extracted with water steam distillation. Thus these oils can be pressed cold, with the extrusion of the pericarp, or with centrifuging after mastication.

ACTIVE INGREDIENTS OF MEDICINAL PLANTS AND THEIR USE
Plants used for healing are called MEDICINAL PLANTS.
The number of plant species on Earth is in the order of hundreds of thousands, but only a few hundred of them are the ones whose mechanism of action is so well known that they can be officially used as medicinal plants. In this sense, only officially approved plant species are considered medicinal plants. (Plants and their drugs listed in the VIIIth Hungarian Pharmacopoeia and approved by the National Pharmaceutical Institute in our country.)
HERBAL MEDICINE is the part of medicinal plants used for healing purposes, the raw material of herbal medicines. A herbal drug can be: the part of a given species containing the most active ingredients, e.g. flower (herbaceous plant), leaf (lemongrass), root (mallow), fruit (coriander); the product produced from plant raw materials, e.g. essential oil (peppermint), fatty oil (pumpkin without seed coat), balsam and resin, as well as medical coal (lime charcoal) and tar obtained through the transformation of plant raw materials.
Many compounds are formed and accumulated in plants. These are the so-called INTERNAL or CONTENT substances, which make up the entire chemical composition of plants. For science, it is important to get to know all the content materials, but from the point of view of medicine, those materials that have a biological effect are important: they have a positive effect on the human body, and their specific effect on life processes and disease processes can be verified.
ACTIVE INGREDIENT is therefore a biologically active substance with a therapeutic effect. The existence of the active ingredient was first described by Paracelsus in the 16th century. According to his view, the healing effect of plants is not in the whole plant, i.e. in the internal substances, but in addition to the four primal elements, there must be a fifth, inner, divine essence (quinta essentia: quintessence), to which the healing effect can be attributed. In modern terms, this is called an active ingredient
EXCIPIENTS are side effects that promote or inhibit the effect of the active substances, which do not have a pronounced physiological effect, but the overall effect of the drugs is still affected by their presence (e.g. in the process of dissolution and absorption of the active substances).
A LEADING SUBSTANCE is a characteristic substance or substances used to classify the content of the drug.
The conducting substance is not necessarily the same as the active substance, but its presence and quantity characterize the identity and quality of the drug.
The active substances can be grouped according to several aspects. The systematization below shows the division based on the metabolic processes leading to their formation, i.e. the biogenesis of the active substances, which was created by the botanist Dezső Vágújfalvi (1936-), an expert in plant active substances, flavors and fragrances.
Based on this, the active ingredients are classified into 5 main classes of substances:
1. saccharides (sugar-like or sugar-derived compounds, e.g. the polysaccharides found in marigolds, but also includes the starch found in the root of the white mallow)
2. phenoloids (this includes, among others, tannins, e.g. found in the leaves and herbs of thyme, medicinal sage, basil, lemongrass, peppermint; lignins; coumarins, such as in anise seeds, flavonoids, e.g. in the flowers of calendula and medicinal chamomile)
3. polyketides (compounds called fatty oils in practice, e.g. in pumpkin seeds without a seed coat)
4. terpenoids (essential oil components are extracted from them, e.g. in the seeds of anise, fennel, leaves of lemongrass, sage, mint, peppermint, etc.)
5. azotoids (alkaloids form the largest group in this substance class, but it also includes the mustard oil glycoside in the seeds of white and black mustard)
Cultivation of Anise (Pimpinella anisum)
 Anise was used in ancient Egypt both as a medicinal plant and as a herb. In Hungary, it has been a popular herb in modern times, too. Anise is registered in the Eighth Hungarian Pharmacopoeia. It is used to improve appetite, as a digestive and to thin mucus. Its fruit is mainly used for liqueurs but it is also used by the food and sugar industries.
Anise is an annual, herbaceous plant. It belongs to the carrot family (Umbelliferae). The branching, vertical, slightly hairy stem of anise grows to a height of 40-70 cm; it develops leaves along its whole length. Having weak stems, anise tends to lay down on the ground. The feathery pinnate leaves on the stem are incised 2-3 times. The flower is a compound umbel, composed of 10-15 inflorescences. The fruit is an oval or reverse pear-shaped schizocarp (diachaenium), with the remnants of the two stigmas still visible at the tip. It is greyish green or greyish brown. Thousand grain mass is 1.5 – 4 g.
Environmental Requirements
Anise prefers a warm climate, therefore it cannot be grown in the cool, northern parts of Hungary. Optimum temperature for germination is 20-25 oC. Seedlings are not sensitive to cold and are able to tolerate mild frost. Anise needs plenty of water and nutrients. Germination requires moisture. The water uptake of anise is highest between stem extension and flowering. Optimally, the weather should be warm and dry during the maturation of fruits. Anise will give sufficient yields only when grown in a neutral, well structured, rich, well drained soil. Anise cannot be grown in sand or cold, compact soils.
Forecrop
Anise is best grown after cereals as they allow for soil cultivation once they have been harvested. Green fodder crops (e.g. maize) as forecrops also give good results. Anise cannot be grown after other Umbelliferae plants with easily scattering seeds (coriander, fennel, etc.) as they share the same diseases, and the separation of their fruits from that of anise is difficult.
Soil Preparation
Once the forecrop has been harvested, break the stubble immediately. Keep cultivating the soil till autumn ploughing to kill weeds and encourage the germination of weed seeds. To facilitate the penetration of winter precipitation, the soil must be ploughed at a depth of 25-30 cm. The seedbed should be prepared in the spring as soon as possible. Prepare the surface as if for a garden.
Fertilising
Anise will give sufficient yields of high quality only when its feeding requirements are met by nutrients easily taken up from the soil. Apply artificial fertilisers of 40-60 kg N, 60-100 kg P2O5, 40-60 kg K2O per hectare for an expected yield of 1 ton per hectare, during soil cultivation in the autumn and seedbed preparation in the spring.
Propagation
Anise should be sown at the end of March or the beginning of April, when the temperature of the soil exceeds 7-8 oC. When sown in colder soil, germination will fail, leading to gaps in the field. Sow anise at a row distance of 25-30 cm and a depth of 2-3 cm. Seeding density should be 15-20 kg/ha (80-100 seeds/m). Use a roller immedietaly after seeding to promote uniform germination.
Plant Care
Germination and early development are rather slow. Plant care should therefore focus mainly on weed control. Anise tolerates some herbicides, however, mechanical weed control is often required in addition to chemical treatment as the plant itself cannot out-compete weeds. Pre-emergent spraying with Merkazin (2.5-3.5 kg/ha), Maloran 50 WP (2-3 kg/ha) or Stomp 330 EC (4-6 l/ha) reduces weed infestation significantly and facilitates mechanical weed control. If plants are taller than 10 cm, the field may be repeatedly treated with Afalon (2 kg/ha), till bud formation. This treatment will kill most dicot weeds within 10-14 days. For monocots, use Dual Gold 960 EC 2 (2.5 l/ha) in the beginning, then Fusilade S (1-3 l/ha).
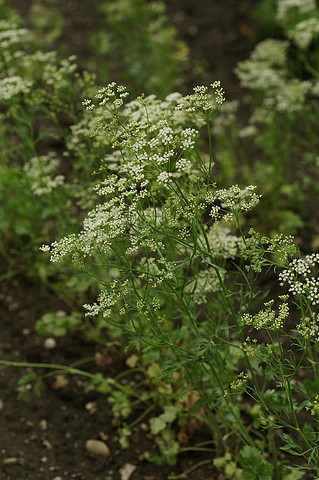
Between flowering and the maturation of fruits, the control of hemlock (Conium maculatum) requires special attention. The fruit of hemlock is toxic, its shape and size are almost identical to those of the anise fruit, so separating the two is virtually impossible. Anise fruit contaminated with hemlock cannot be sold nor be used as drug or seed.
Pest Control
The flowers of anise, like those of coriander, may die if attacked by bacterial diseases. Insect vecors of the diseases should be controlled at the time of stem extension. The most important pests of anise are the caterpillars of owlet moths (Noctuidae), Depressaria daucella and swallowtail (Papilio) papillions and the larvae of leaf miners.


larvae of leaf miners caterpillars of owlet moths
Image source: http://www.edenkert.hu/profi-kertesz/aktualis-kerti-munkak/ktalaj-kartevok-nematop-biocont/2811/
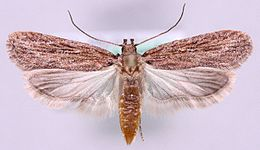
Cumin moth
Image souce : http://wikipedia.org
Harvesting
Similarly to other Umbelliferae plants, the fruits of anise mature continuously, in batches, but unlike the fruits of its relatives, the schizocarps of anise scatter relatively less, anise may be harvested in a single cut. Schizocarps of the main inflorescences located in the middle of the compound umbel yield the drug of the highest value.
Single cut harvest may be commensed after the end of July, when the fruits in the main umbel are ripe. By this time, all the leaves on the stem will have died. When harvesting, threshing characteristics should be set in such a way that the composite fruits do not break.
If anise is harvested in cold and wet weather and the maturation of fruits is drawn out, double cutting may be necessary. In this case, anise should be swathed when the fruits in the main umbels are wax-ripe then the fruits are threshed with a combine grain harvester following a 4-6-day after-ripening period. Expected yield is 0.5 – 1 ton/ha.

Processing
The water content of fruits exceed 14-15%, especially when anise is harvested in a single cut with a combine harvester so drying is essential. Industrial grain dryers are perfectly suitable for the purpose, but the fruits may also be dried by spreading them out indoors, in a well ventilated room. Anise fruits should be cleaned of stems, leaves and foreign material.
General Quality Criteria
The drug may contain only the fruit of anise (dried schizocarps). The drug must not be musty or mouldy and it should be free from off-odour. The drug must not contain toxic or harmful plant parts. The drug must not contain live or dead insects, their larvae, feces or webbing, neither should it contain plant protection products or their residuals.
As the drug (fruits) is used for medical purposes, it must not contain the seed of toxic plants at any time. The cleaning waste still contains essential oils which may be distilled.
The drug must not contain the fruit (diachaenium) of the toxic hemlock (Conium maculatum). It is smaller than the fruit of anise, is not hairy, tastes bitter and does not smell like anise. When moistened with 10% caustic soda and slightly warmed, it emits a pungeant smell, resembling stale fish or rodent urine.
Anise as Class I commercial herb should have 96.5% purity; it may contain maximum 2.5% of injured fruits and organic foreign material material and maximum 1% of inorganic foreign material. Its essential oil content should be at least 1.5%.
Quality criteria for the drug are prescribed by the European Pharmacopoeia.
Recommended Times for Checking and Consultation
1. Beginning of May, assess weed infestation, decide on performing mechanical or chemical weed control.
2. Beginning of August, assess hemlock infestation, determine harvest time.
Cultivation of Basil (Ocimum basilicum)
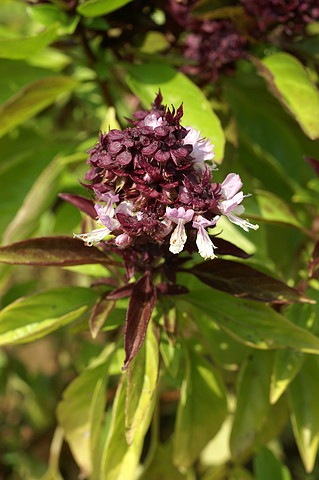
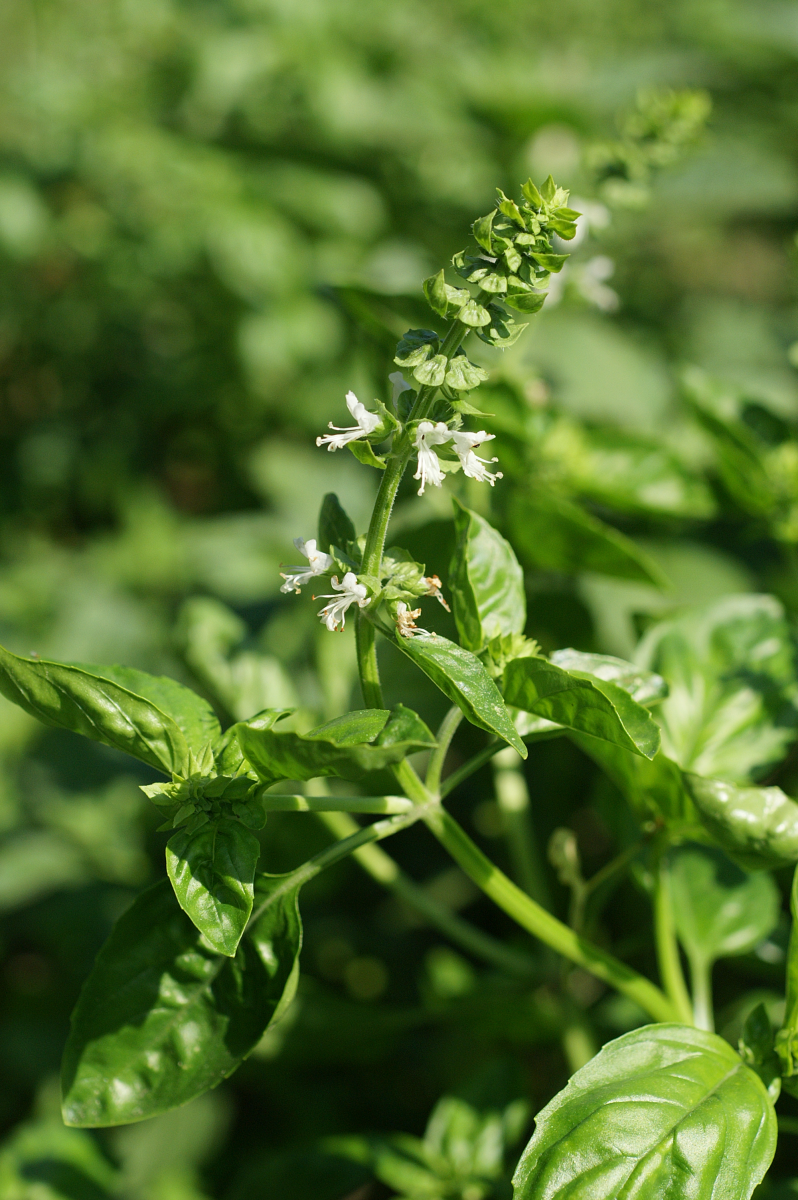
.png) The annual, herbaceous basil belongs to the mint family (Lamiaceae). Its taproot system penetrates deeply into the soil. The erect stem develops branches from its base; it grows to a height of about 40-60 cm. The decussate, glossy green, oval or spear-shaped leaves are petiolate and might obtain a reddish-brown tinge. The inflorescence is composed of loose whorls on a spike; it develops at the top of the flowering stem. The small flowers are white or pale pink and open from the bottom upwards in the inflorescence. The flowering period lasts from the middle of July till the middle of August. The fruit is a black or dark brown nutlet. The maturation of fruits is an elongated process, and they tend to scatter. Thousand grain mass is 1.2 – 1.8 g.
The annual, herbaceous basil belongs to the mint family (Lamiaceae). Its taproot system penetrates deeply into the soil. The erect stem develops branches from its base; it grows to a height of about 40-60 cm. The decussate, glossy green, oval or spear-shaped leaves are petiolate and might obtain a reddish-brown tinge. The inflorescence is composed of loose whorls on a spike; it develops at the top of the flowering stem. The small flowers are white or pale pink and open from the bottom upwards in the inflorescence. The flowering period lasts from the middle of July till the middle of August. The fruit is a black or dark brown nutlet. The maturation of fruits is an elongated process, and they tend to scatter. Thousand grain mass is 1.2 – 1.8 g.
The active ingredient accumulates in above ground parts, giving the plant a rather characteristic odour. The most important components of the essential oil of basil varieties grown in Hungary are methyl chavicol (50-55%) and linalool (40-45%). Basil is a popular kitchen herb, due to its peculiar odour and taste, and it is also used in the perfume and liqueur industries. Basil is a digestive, it also used in herbal tea mixtures for its carminative, diurative and expectorant properties.
Environmental Requirements
Basil prefers a warm climate and requires a great deal of light. It is sensitive to cold, its leaves turning black and dropping already at 0.5-1 oC. In the vegetative season, basil needs about 550-600 mm precipitation. Under Hungarian climatic conditions, basil may be grown on irrigated fields. The water demand of the plant is high, especially in the period following the development of its side branches. It prefers fertile soils with a good drainage that warm up quickly. Its seeds require 18-20 oC for germination.
Forecrop
Basil is not sensitive to its forecrops. It is best grown after row crops. Its field should not be infested with perennial weeds. If the basil population contains too many weeds, the selection of weeds from the yield after harvest will take too much time, resulting in increasing production costs.
Soil preparation
Autumn ploughing should be followed by careful and professional seedbed preparation in the spring. The soil should be prepared as if for a garden, with a texture of fine granules. It is essential to preserve soil moisture so frequent disturbance should be avoided; if cultivation is necessary below seeding depth, apply a roller on the field afterwards.
Fertilisation
Basil utilises the delayed benefits of organic manure effectively so it does not require direct manure application. Apply 35-40 kg/ha nitrogen, 55-70 kg/ha phosphorus and 60-80 kg/ha potassium during the autumn soil cultivation and 30-40 kg/ha nitrogen as a starter in the spring. After the first cut, basil will need 40-50 kg/ha nitrogen.
Propagation
Basil may be grown both by direct seeding or transplanting.
Raising transplants
Transplanting, being more costly compared to direct seeding, is not used frequently any more. Seeds are sown into a cold frame in the second half of March, at a row distance of 15-20 cm and a depth of 0.5 cm.
About 1 kg of seeds is needed for a hectare.
Transplants need 6-8 weeks to grow to a suitable size.
Once 8-10 cm tall, transplants may be planted in the field at a row distance of 40-50 cm and plant distance of 30 cm, but only after the last spring frost.
Seeds may be sown on seedtrays as well (row seeding). Seedlings may be pricked out 10-12 days later, when they have developed their two seed leaves. Once spring frosts are no longer expected (second half of May or so) 8-10 cm tall transplants may be planted out, after a few days of hardening off.
Direct seeding
Sowing time depends on soil temperature, though generally it is the end of April, beginning of May. Seeds should be sown at a row distance of 36-48 cm, at a depth of 0.5-1 cm, into a well prepared seed bed with fine granules and a smooth surface. About 6-8 kg of seeds are needed for a hectare, corresponding to 80-100 seeds a meter. Run a roller on the filed after sowing.
Once the seeds have germinated, mechanical weed control should be performed (inter- and intra-row hoeing) before the canopy closes. The basil stand should be irrigated when necessary.
 Plant care
In the case of direct seeding, inter-row hoeing and thinning are necessary after germination. After thinning, 6-7 plants should be left per meter. In the case of transplanting, inter- and intra-row hoeing are essential, they should be performed at least twice. The basil stand should be irrigated when necessary.
Pest Control
Basil has no known pests in Hungary, chemical control therefore is not necessary.
Harvest
The leafy and flowering above-ground shoots of basil may be cut twice in the season. Basil is cut first usually in the middle of July, when the first blooms appear, i.e. when the concentration of active ingredients in the plant is the highest. The second cut is performed when the second growth starts flowering, but essentially before the onset of the autumn frosts.
Basil is generally harvested with a cutter loader, or, in small fields, manually, using pruning scissors. Shoots should always be cut above the first branch, at a height of 8-10 cm. It is particularly important in the case of the first cut, as it guarantees the development of a second growth. When harvesting manually, the yield should be kept free of weeds.
Processing
The yield should be transported to the drying facility immediately (warm air dryer, industrial crop dryer, drying frame, loft).
After drying, leaves and inflorescences should be removed from the stems (usually mechanically, though smaller batches may also be processed manually). At the same time, stems, alien parts and sand should be eliminated. Removed leaves and inflorescences are separated from stem residues and soil using specific separators and sieves with a mesh size of 5 mm then 3.5 mm. The drug is the herba gained after cleaning the batch with the 3.5 mm sieve. The drug may not contain more than 2.5% sand. Expected drug yield is 1.5-2 t/ha.
General Quality Criteria
The drug may contain the leaves and inflorescences of basil, cut at flowering, then dried and cleaned. Basil as a quality commercial herb and the Class I. drug may contain maximum 2% of stem parts and 5% of fruits.
The drug may contain maximum 1% of foreign plant parts. Essential oil content should be at least 0.5% for Class I. Essential oil content should be at least 0.3% for the commercial herb.

Recommended Times for Checking and Consultation
1. In the spring, when the seedbed is being prepared, at sowing (March, April)
2. Before the first cut, to determine cutting time (beginning of July)
3. Before the second cut, to determine cutting time (beginning of September).

Cultivation of Summer savory (Satureja hortensis)
In Hungary, summer savory has been grown for a long time both as a herb and as a medicinal plant.
Summer savory contains 0.5-2% essential oils, phenoloids, mucus, resins, bitter substances, etc. The tea made of summer savory is used to cure low blood pressure, gastroenteritis, meteorism and coughing. It is a herb used in domestic as well as industrial kitchens. Its essential oil is used by the canning and liqueur industries.
The drug is composed of the leaves and flowers crumbed from the dry stems. The densely branching root system of summer savory enmeshes the soil. Roots are woody at the base of the stem. The stem is 30-50 cm in length. Its decussate, lanceolate leaves are 1-2 cm long with an entire edge. Both sides of the leaves are densely covered by essential oil glands. The white or pinkish-purple flowers are small, forming a one sided spike. Its fruit is a nutlet (carcerulus) that splits into four segments. Thousand grain mass is 0.5-0.6 g.
Environmental Requirements
Summer savory prefers a warm climate and thrives in the full sun. It can be successfully grown in rich, well drained, medium textured loam, loess or brown sand that warms up easily. Being draught tolerant, summer savory gives a satisfactory yield without irrigation. Its seeds scatter, causing weed problems in the following year.
Forecrop
As an annual plant, summer savory may be inserted anywhere in the crop sequence and it may be grown after most crops. Crops receiving large amounts of fertilizers are considered good forecrops. Do not grow it in the same field again for 2-3 years.
Soil preparation
For summer savory, the soil should be prepared by deep ploughing in the autumn and seedbed preparation in the spring. The soil should be prepared as if for a garden by March, with a texture of fine granules and as much soil water preserved as possible. Do not disturb the soil layers lying deeper than seeding depth (e.g. by disc tilling). Should it be necessary to do otherwise, compact the soil after tilling by running a roller over the field.
Fertilizing
Summer savory is able to utilize the delayed benefits of organic manure. Artificial fertilizers with phosphorus (P2O5, 50-60 kg/ha) and potassium (K2O, 60-80 kg/ha) are applied during the autumn soil cultivation. Summer savory is particularly sensitive to the potassium content of the soil as this element has an influence on the healthy development of the plant. Therefore, assess the nutrient contents of the soil before applying artificial fertilisers (analysis of forecrop and soil). Apply N fertilisers (50-80 kg/ha) in the spring before sowing.
Propagation
As summer savory requires warmth and sunlight, its optimal sowing time is at the end of March or the beginning of April, when the soil has warmed up sufficiently. Germination starts at 14-16 oC. Sowing depth is 0.5-1.5 cm, depending on the moisture content of the soil. Sow it at the end of April where it can be irrigated only. Row distance is 25-30 cm, or more (45-50 cm) in the case of mechanical (machine) cultivation. Firm the soil by rolling, both before and after sowing, to facilitate uniform germination. Seed requirement for a hectare is 4-8 kg, depending on soil type and precipitation. Generally, 120-140 healthy seeds are needed for each meter. Once the seeds have germinated, initial growth and development are quite rapid, with the first flowers appearing after 75-80 days.
 Plant Care
If the stand is too dense, thinning is required when the plants have 4-6 true leaves. Optimum plant distance is about 15-20 cm. When grown on an industrial scale, run a light harrow against the rows for thinning.
At a row distance of 45-50 cm, weeding is done mechanically. Use the following herbicides for chemical weed control:
1. Before sowing: Aresin (3-4 kg/ha)
2. Post emergent application, when plants are 10-20 cm tall: spray with Aresin (1-2 kg/ha, if necessary). For the control of monocot weeds, use Fusilade or Kusagard (1.5-2 kg/ha).
Chemical treatment should be supported by interrow harrowing. Interrow cultivation is essential after the first cut.
Pest Control
Summer savory is not infested by contagious diseases (except for rust epidemics that may break out every 5-6 years), thus the plant does not require chemical treatment.
Harvest
In June, at the beginning of the flowering phase, when the plant has still not developed many seeds, the parts above ground are harvested with a cutter loader (stems are cut over the lowest branches). Optimally, summer savory may be harvested twice, first in June, then at the end of September or the beginning of October. Expected yield: 1.5-2.0 t/ha.
Processing
Freshly cut, green plant material may be dried by spreading it out indoors, in a well ventilated room (never in the sun) or by artificial drying (drying temperature should not exceed 40 oC). On an industrial scale, the cultivation area may be increased if artificial drying facilities are available and the risks linked to natural drying may be minimised.
Only plants cut in time and dried while maintaining their original green colour yield a quality product. The dry herba may be processed manually or by machines. Processing is a two-step procedure. In the first step, plant material is pre-crumbled by means of an adapted combine harvester (any type is suitable, e.g. SZK-4 or E-512). The combine harvester may be replaced by an old thresher machine also. In this step, thick stem sections are removed, and then crumbling may follow.
Combine harvesters may be easily adapted to thresh the herba of summer savory. Before starting, make the following modifications:
Ø dismount header
Ø reduce drum rotation speed to 600 min-1
Ø disconnect rear beater
Ø disconnect elevators (only the horizontal feeding screw under the cleaning shoe should operate)
Ø open lower shutters of elevators
Ø disconnect fan
Ø set chaffer and sieves at the cleaning shoe in a wider angle.
The valuable drug may be saved and losses may be reduced if the combine harvester stands on a tarpaulin while threshing summer savory.
Dry leaf crumble should be sieved several times (mesh size: 2.5 mm) to prevent stem fragments from contaminating the product. The drug should be stored in a dry, clean, well ventilated room, away from any foreign material with a strong smell. Do not expose the drug to direct sunlight.
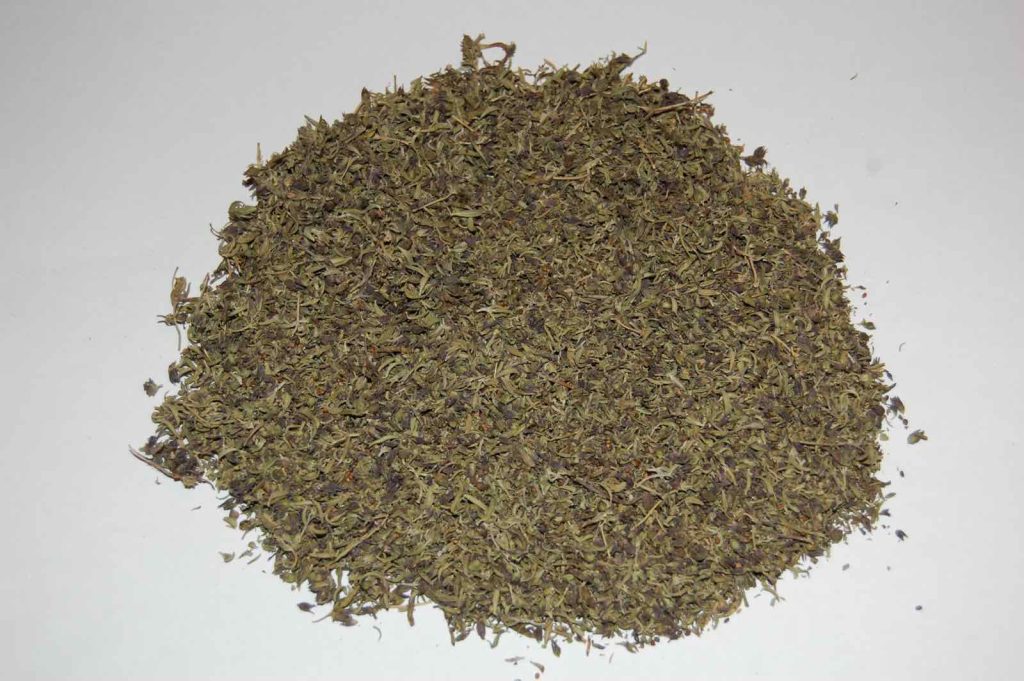
General Quality Criteria
The drug is generally brownish green as the flowers are yellowish brown when dried, whereas nutlet segments are light brown. The leaves are usually fractures as a result of sieving. The proportion of thin stem segments is variable. Stem segments should be removed by repeated sieving (mesh size: 2.5 mm).
The drug may contain only the dried, crumbled flowers, leaves, fruits and thin stem segments of cultivated summer savory. The drug may contain maximum 1% of other plant parts and foreign plant parts and maximum 1% of inorganic foreign material. Essential oil content should be 2%.
The drug must not be musty or mouldy and it should be free from off-odour. The drug must not contain toxic or harmful plant parts. The drug must not contain live or dead insects, their larvae, feces or webbing, neither should it contain plant protection products or their residuals.
Recommended Times for Checking and Consultation
1. Middle of June, determine harvest time.
2. Beginning of July, processing, manipulation and quality control.
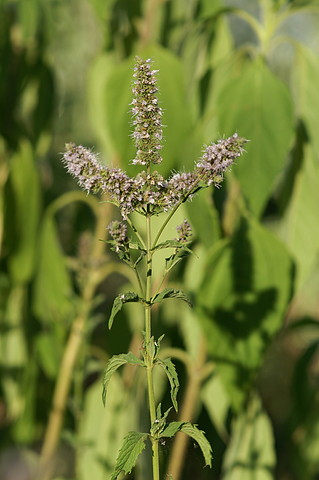
Cultivation of Peppermint (Mentha piperita)
 Peppermint is one of the most important and widely known essential oil plants. It has been grown for a long time in Hungary, with special regard to the Lake Balaton region and Szabolcs-Szatmár County. Its leaves and herba are used in tea mixtures as well as in foods, cosmetics and household products. Its essential oil is widely used by the modern pharmaceutical industry. Menthol, a substance with a spicy odour obtained from the essential oil, is a bactericid.
Peppermint belongs to the mint family (Lamiaceae). Its suckers overwinter underground; they also serve the purposes of vegetative propagation. The stem, branching at its top, is usually 40-100 cm in length, depending on the local conditions. The leaves are ovate-lanceolate, serrate at the edges. Both sides of the leaves are covered by glandular trichomes containing essential oil. The flowers are purple and they whither quickly. As peppermint is a hybrid plant, its nutlets (carcerulus) are practically sterile.
Environmental Requirements
Peppermint has a high demand for both water and nutrients. In Hungary, it gives sufficient yields where its high water and nutrient demand can be met. Peppermint prefers loose, rich, well drained brown sand, peat or alluvial soils that warm up relatively easily. It cannot be grown in dry, waterlogged or overly heavy soils, in shifting sand or in areas prone to frost.
Yield and essential oil content are proportional to exposure to sunlight. Thus, peppermint is grown most successfully on sunny slopes facing south. Its water demand increases continuously from emergence till flowering.
Forecrop
The best forecrops are early harvested cereals or row crops. When selecting the place of production, it is important to bear in mind that peppermint is grown on the same field for 2-3 years so the field must not be infested with perennial weeds that have stolons with special regard to field bindweed (Convolvulus arvensis). Once removed, in order to prevent diseases, do not grow it in the same field again for 4-5 years. For a guaranteed high yield, pick a field where peppermint can be irrigated.
Soil Preparation
Organic manure should be applied after the forecrop has been harvested. Plough the soil deeply in the summer or in the autumn. Prepare a fine textured soil for planting. During soil preparation, pay attention to preserve as much soil moisture as possible.
Fertilisation
Peppermint has a high nutrient demand. The plant will not give big yields with high essential oil content without fertilising. For the best results, apply aged manure before planting (20-30 t/ha). If the manure contains straw and is not aged properly, it loosens the soil and leaves holes in it, increasing the risk of winter killing. If manure is not available, apply compost in a dose of 15-20 t/ha. It is useful to apply artificial fertlisers (50-70 kg/ha of P2O5 and 40-60 kg/ha of K2O) in the autumn, together with the manure.
In the spring, apply nitrogen (80-100 kg/ha). Two thirds of the nitrogen fertiliser should be applied before emergence and the rest after the first cut. In the years that follow, apply as phosphorous fertiliser (70-120 kg/ha of P2O5) at the autumn ploughing. Nitrogen should always be applied as described above. If the stand is irrigated, the dosage of nitrogen may be increased by 25-30%.
Peppermint is sensitive to the availability of microelements. Foliar fertilisers (0.2% Wuxal, 0.3% Volldünger, 1% Mikramid) applied 2-3 times in the vegetation period may increase yield and essential oil content.
Propagation
Peppermint is propagated with its stolons or its suckers. Stolons should be planted in the autumn whereas suckers are best planted in the spring. Stolons for propagation are collected from 2-3 year old regularly harvested stands, after the second cut. Stolons may be collected once the soil has been loosened by a plough without mouldboard. A proven method of collecting stolons is using a chain potato digger. The moisture content of collected stolons decreases significantly in the matter of a few hours, especially in windy or sunny weather so they should be transported for planting as soon as possible or covered by earth or plastic after stacking. Plant stolons at a row distance of 70-80 cm, into furrows made by a cultivator. Lay stolons into the furrows one after the other, then cover them manually or with a hoeing plough. Once the furrows are cut, plant the stolons and cover them as soon as possible to avoid the loss of moisture. Compact the soil by running a roller on the field after planting. Stolons should be planted at a depth of 10-12 cm, otherwise they dry out or are killed by frost (if the soil cover is shallow) or the shoots cannot penetrate the soil (if they get too deep). About 1.5-2.0 tons of stolons are required for one hectare.
In the spring, propagate mint by planting suckers. Optimally it is carried out in May, depending on the weather. For planting, use 10-12 long suckers. After rain or irrigation, suckers are easily removed from the stand and planted with planting machine.
Protect suckers from drying out before planting. Cover them after pulling up, put them in a cellar and water them when transporting. Good establishment should be promoted by irrigation (0.3-0.5 l water per plant). Plant the suckers at a row and plant distance of 70 cm and 30-40 cm, respectively. About 40 000-50 000 plants are required for a hectare.
Propagation by stolons in the autumns results in yields bigger by 25-30% than propagation in the spring; however, the use of suckers (transplants) is cheaper, easier and can be mechanized.
 Plant Care
Peppermint should be kept free of weeds during the vegetation period. After establishment, when the shoots emerge, interrow weed management may be performed both manually and with machines.
Chemical wed control is also possible. Apply 2-3 kg Geonter 80WP (Sinbar)(active agent: 80% terbacil) per hectare before the shoots emerge in the spring in the case of propagation by stolons, or when the transplants have established, in the case of spring planting. Spray the herbicid evenly, with 400-600 liters of water per hectare. In 2 and 3 year old stands, the dosage of the chemical may be increased to 3-4 kg; spray in the spring when peppermint is dormant. Geonter is not toxic to peppermint; it has a wide spectrum of activity and kills weeds for the whole vegetation period. In older stands, field bindweed (Convolvulus arvensis) may proliferate and, being resistant to terbacil, cause serious problems. In 2-3 year-old stands, use Geonter 80 WP (3-5 kg/ha), Aresin (3-4 kg/ha) or Merkazin (4-5 kg) when peppermint is still dormant.
In the dry season and after the first cut, peppermint should be irrigated if possible, with a volume of water corresponding to 30-40 mm precipitation.
Pest Control
The most dangerous disease regularly infesting peppermint and causing severe damage is mint rust (Puccinia menthae). Rust infested leaves die and plants become leggy. The essential oil content of damaged leaves decreases and the quality of the oil is poor. To prevent the onset of mint rust as well as to reduce infestation levels, autumn ploughing is essential in mint stands. Plough at a maximum depth of 15-20 cm in the second half of October, but not later than the middle of November, then run a ring roller. Mint rust should be controlled chemically. Spraying with Tilt (0.9-1 l/ha) or Vigil (1.2-1.5 l/ha) at the onset of the disease should provide sufficient protection. To control spider mites and cicadae, use Danitol 10 EC combined with Nissorun 10 WP (0.9-1 l/ha and 0.4-0.5 kg/ha, respectively) at small farms.

At industrial scale, use Filitox (0.8-1 l/ha) or Ultracid 40 WP (1.2-1.5 kg/ha). If necessary, the fungicide and the insecticide may be sprayed in one go, as a tank mixture. To provide for optimum coverage, spray these pesticides in water (800-900 l/ha).

Harvest
The drug is composed of the dried leaves and leafy stems of peppermint. Harvest for folia before the flower buds appear (when petioles break with a snap), harvest for herba at the beginning of the flowering period.
Peppermint propagated by stolons in the autumn may be harvested twice already in the first year (in July and September). If the stand is planted in the spring, usually it may be cut only once, at the end of August. Stands may be harvested twice from the second year onwards, regardless of the propagation method.
To produce dry leaves, cut peppermint leaving a stubble of 5-6 cm and remove the leaves from the stems immediately. When the plant withers, removing the leaves becomes troublesome. The folia (drug) may include 2-3 pairs of leaves from the tip of the shoots. Expected yield is 1.0-1.5 t/ha dry leaves.
As the essential oil content of the shoots is the highest at the beginning of the flowering period, peppermint should be cut for hay and essential oil production at that time. Do not deviate from this schedule unless the stand is threatened by rust. If the plants are infested with rust, cut the stand immediately. Peppermint grown in small fields may be harvested by sickle or scythe. In large scale cultivation, use a mower or a swath cutter. Allow the harvested plants to dry for a few days, and then transport them indoors for drying by lorry. If peppermint was cut for the essential oil, it should not be swathed but transported immediately to the distillation facility. Expected yield is 2-3 t/ha dry herba or 30-50 kg/ha essential oil.
Processing
Leaves removed from the stems should be dried in a well ventilated, dry, clean loft or other room indoors, spread in a layer of 2-3 cm. Do not turn peppermint leaves during drying as the injured leaves turn brown easily, resulting in a diminished quality.
To produce peppermint hay, use industrial grain dryers, but the plant may also be dried sufficiently in a well ventilated loft or other room indoors, after having allowed the swath to wilt for a few days in the field.
Essential oil may be extracted from fresh peppermint by water vapour distillation in the usual distillation equipment. Do not allow the batch to become moist before distillation as it reduces essential oil content.
General Quality Criteria
The drug may contain only the dried leaves of peppermint.
The drug must not be musty or mouldy and it should be free from off-odour. The drug must not contain toxic or harmful plant parts. The drug must not contain live or dead insects, their larvae, feces or webbing, neither should it contain plant protection products or their residuals. Class I and Class II drugs may contain maximum 1% and 2% of foreign plant parts, respectively. Class I. drug may contain maximum 1% inorganic foreign material. The essential oil content should be at least 1%.
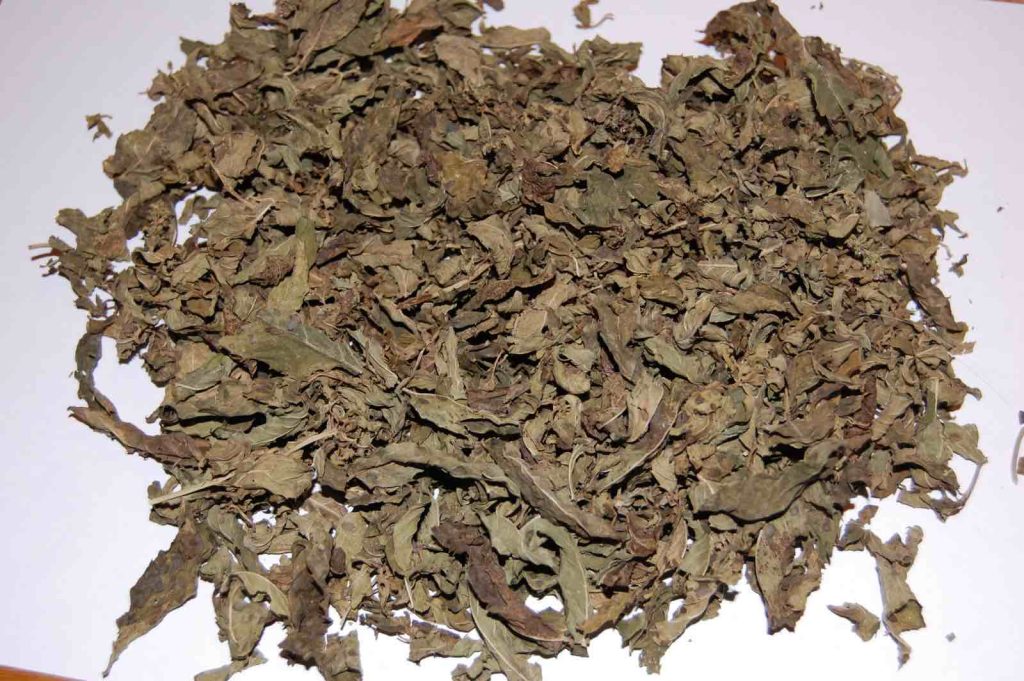
Quality criteria for the drug are regulated by the European Pharmacopoeia.
Recommended Times for Checking and Consultation
In the first year
1. Selecting the field in the autumn or spring (depending on propagation method).
2. Assess pests and diseases in June, arrange for pest management accordingly.
3. Determine harvest time in July.
In the second and third year
1. Assess weed situation, nutrient and water content of the oil and pests in Aril and May.
2. Determine harvest time in July.
3. Assess the establishment of the stand and weed situation in September and October. Decide on maintaining the stand.
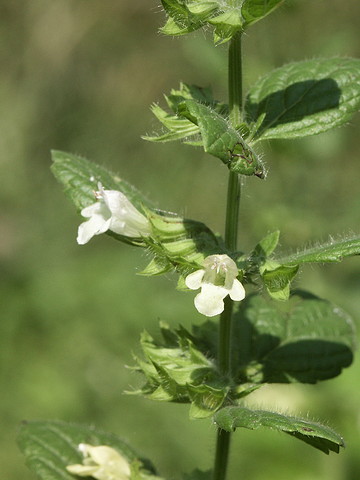
Lemon Balm (Melissa officinalis)
 Lemon balm, or balm as it is sometimes referred to,is a perennial plant with a high essential oil content and an odour resembling lemon.
The leaves and the stems are used as drug. They are used in tea mixtures though the leaves alone also make a pleasant tea. The drug is a dominant ingredient in relaxing herbal teas and in mixtures that ease stomach problems. It is also used to increase appetite and improve taste. Its essential oil has antiviral as well as antibacterial properties.
Lemon balm belongs to the mint family (Lamiaceae). It is a half shrub that can be successfully grown in Hungary for 3-5 years in the same location. The roots develop from the nodes of the rhizome; being characteristically thin and brownish. From the base of the scale leaves, long stolons emerge that eventually break the surface of the soil and develop into shoots. The vertical stems are 40-80 cm tall. The plant has ovate, toothed, decussate leaves, savoyed on the surface. The verticillastrate (i.e. whorl-like) flower clusters grow from the base of the leaves. The flower buds are yellowish whereas the petals of the flowers are white. Lemon balm is an excellent honey plant (thus its Hungarian name, ’’beeplant”); and its flowers provide a rich source of nectar. The fruit of the plant is an almost black, oval nutlet. Thousand grain mass is 0.6 – 0.7 g.
Environmental Requirements
Lemon balm originates from Southern Europe and the Near East, preferring a warm climate and thriving in the full sun. The plant is moderately frost hardy, older stands may be particularly sensitive to cold. It grows well in all kinds of soils except for in extreme soil types. The roots penetrate as deep as 20-30 cm meaning it prefers deep, fertile, well drained soils that warm up easily.
Lemon balm is relatively draught tolerant but it needs irrigation to produce sufficient quantities of drug, yet severe draughts may kill the plants.
Lemon balm is difficult to germinate, requiring a minimum temperature for germination of 10-12 oC, and an optimum temperature of 18-20 oC.
Forecrop
Lemon balm has no special requirements regarding its forecrop but, as the plant needs lots of nutrients, it grows best after row crops that have received large doses of manure. Once removed, in order to prevent diseases, do not grow it in the same field again for 4-5 years.
Soil preparation
Soil preparation depends on propagation. When grown from seed, autumn ploughing should be followed by careful and professional seedbed preparation in the spring, making the soil suitable for the tiny seeds. In this case, the soil should be rolled prior to and after sowing. When planting lemon balm, the soil preparation process is similar but without the rolling.
Fertilising
On soils poor in nutrients, apply 20-30 tons of organic fertiliser per hectare during autumn ploughing.
In years when the drug is harvested, lemon balm needs balanced fertilising. Apply an artificial fertiliser (60-70 kg/ha N, 40-50 kg/ha P2O5 and 70-80 kg/ha K2O). Half of the nitrogen dose should be applied in the form of top dressing after the first cutting to increase yield.
Propagation
Lemon balm may be propagated by direct seeding, transplanting or division.
Direct seeding does not guarantee success as the seed of lemon balm is difficult to germinate and germination takes a long time (more than 3 weeks). Seedlings develop very slowly. As a result of slow germination, fields are prone to weed infestation, which is why it is more feasible to propagate lemon balm by transplanting.
Transplants may be grown in two ways.
Ø Seeds are sown late in February or at the beginning of March in a propagator or heated plastic tunnel. Seedlings will be ready for transplanting by the end of April or the beginning of May.
Ø Pretreated seeds are sown at the end of March or the beginning of April into outdoor beds and covered with plastic when necessary. Transplanting takes place at the end of August or the beginning of September.
To reduce germination time, seeds should be pretreated by soaking them in 24-25 oC water for 14-16 hours, then keeping them at a temperature around 0 oC for 25-30 hours. Seeds are then ready for sowing. From the two transplanting methods, sowing into outdoor beds is more widely used.
For transplants, seeds should be sown at a row distance of 20-25 cm and a depth of 0.5-1 cm. Sowing for transplants for a hectare requires about 200-250 m2, corresponding to 0.6 kg seed. Transplants are planted by hand or by planting machine as described in the previous sections. Row and plant distances for transplants are 50-60 cm and 30-35 cm, respectively.
Lemon balm may also be propagated by division as its rootstock develops new stems all the time. Healthy, 2-3 year old plants are divided into 3-5 parts. Plants lifted in September should be cleaned from soil and dead, mouldy or woody parts and then divided. The divided plants should be planted in furrows 12-12 cm deep. Cover the roots immediately and firm the soil by rolling. The distance between furrows should be 50-60 cm, with a plant distance of 30-35 cm. Plants may not be divided later than 15 September, otherwise their root system will not establish and the plants may freeze during the winter. About 40,000 – 42,000 transplants are required for a hectare.
Plant Care
Lemon balm develops very slowly at first. Its soil should be kept loose and weed-free in the first year by means of inter-row cultivation (i.e. by hoeing or tilling the field twice). In the second year and afterwards, the field may be kept weed-free by chemical weed management. Before the vegetation period, weeds may be controlled by the application of Merkazin (promethrin, 4-6 kg/ha) or Patosan 50 WP (metobromuron, 3.55 kg/ha). After the first cutting, another application of Merkazin (3 kg/ha) may be recommended.
Though lemon balm is draught tolerant, it yields more when irrigated. Excess water is utilised most effectively in June and after the first cutting.
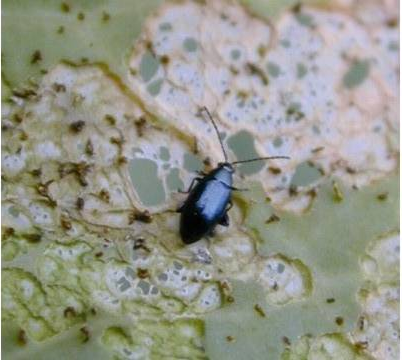
Pest Control
Sucking pests (aphids, leafhoppers) and flea beetles are controlled effectively by spraying with Ultracid 40WP (methidathion).
The spread of the Septoria leaf spot disease may be prevented by spraying with Chinoin Fundazol 50 WP (1 kg/ha for 800-1000 l/ha water) upon appearance of the symptoms. This disease should be controlled as heavily infested plants will lose their leaves.
In dense stands, Puccinia mint rust may cause problems, too. Spraying with Chinoin Fundazol as described above upon appearance of the symptoms may provide effective control but it is better to prevent spreading by cutting the plants as soon as possible.
Post harvest interval is 14-20 days for the chemicals listed above. Make sure this safety period is observed and that spraying is finished in time before harvesting.
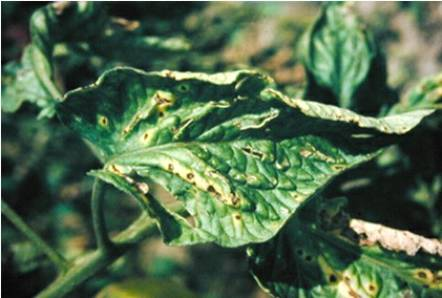
Harvest
Lemon balm may be harvested once in the first year and twice (sometimes 3 times) a year afterwards.
The best time for cutting above ground parts is the beginning of the flowering period, when the flower buds appear. The first cutting should be scheduled to the end of June or the beginning of July. Lemon balm should be harvested again when the new shoots reach the height of 50-60 cm, i.e. usually in the first half of August. (If the weather is favourable and soil is rich is nutrients, a third harvest may be scheduled for September)
Lemon balm should be harvested in sunny weather, when the essential oil concentration in the plant is at its highest. Do not start harvesting before the dew has dried up. Cut the stems 5-10 cm above the soil surface. To produce a good quality drug, only the upper 40 cm of the stems should be kept in the case of stands taller than 50 cm.
Cut the stems manually (by scythe or sickle) or use a herb harvester.
Leaf drug may be produced by removing the leaves from the stems when fresh and dry them.
Expected yield: 2-4 t/ha dry leafy stems
0.7-1 t/ha dry leaves.
Processing
Cut stems or leaves should be transported for drying immediately. Stems should be dried in indoors, in a well ventilated room (barn loft, hovel). Spread the stems out in a thin layer for drying. Artificial drying, when available, should be a preferred option as it improves the quality of the drug (industrial crop driers are suitable for the purpose). The optimum drying temperature is 40 ºC.
Lemon balm is sensitive to injuries, turning brown quickly. Do not turn it during drying. The dried herb may be picked up only when slightly moist (usually in the early morning hours) as dry leaves break easily.
General Quality Criteria
The drug may only contain the leaves of lemon balm (Melissa officinalis), collected and dried at the beginning of the flowering period. Other parts of the plant as well as leaves from other plants that closely resemble lemon balm including the variety Melissa officinalis var. hirsuta, a plant grown by beekeepers, catnip (Nepeta cataria), a plant with heart-shaped, velvety leaves and bastard balm (Melittis melissophyllum) growing in the wild may be present in the drug at 2% altogether. Essential oil content should be at least 0.3%.
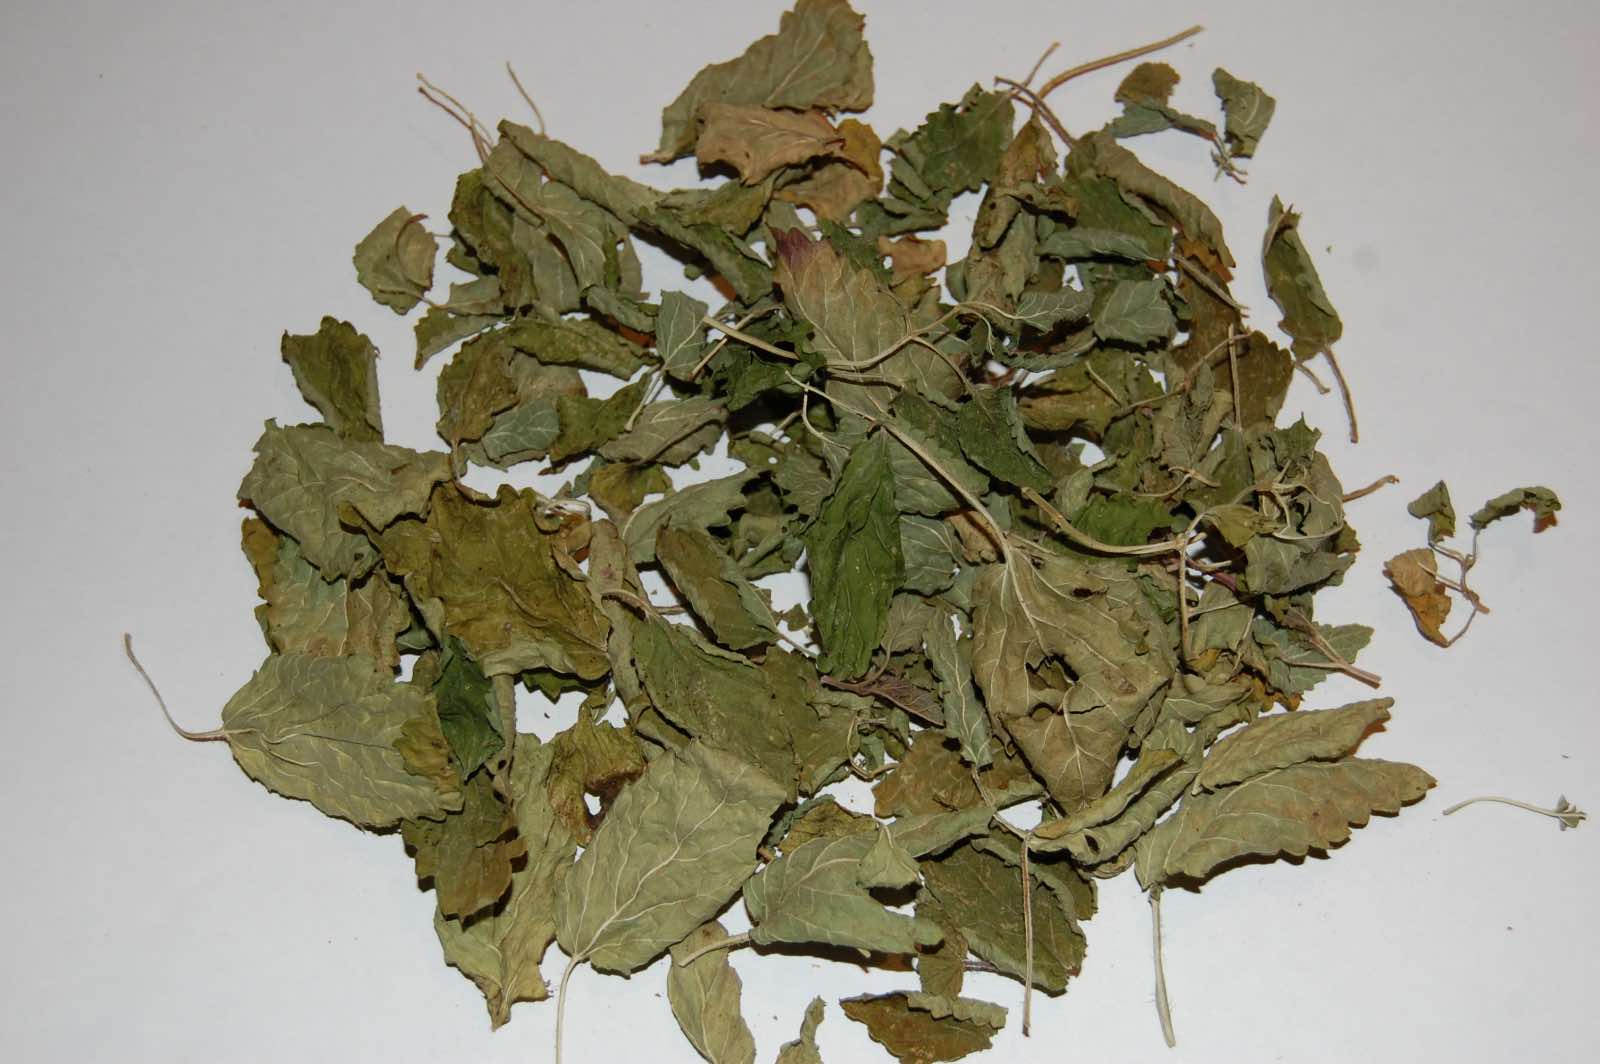
The drug must not be musty or mouldy and it should be free from off-odour. The drug must not contain toxic or harmful plant parts or alien material, neither the residuals of plant protection products, insects or their larvae.
Lemon balm is registered in the European Pharmacopoeia and the Eighth Hungarian Pharmacopoeia.
Recommended Times for Checking and Consultation
1. Determining soil conditions and the exact sowing date prior to growing transplants.
2. Determining transplanting date.
3. Technical consultation for plant protection: determining the date for plant protection interventions to prevent damage by sucking pests and treat fungal diseases in the vegetation period.
4. Optimising dates and methods prior to harvesting.

Cultivation of Fennel (Foeniculum vulgare)
Fennel belongs to the carrot family (Umbellifeare). It is a tall, perennial, herbaceous plant. Its active ingredient is the essential oil accumulating in the fruits, making up 2-6% of their mass. The fruits also contain proteins and fatty oils. The most important component of the essential oil is anetol, but it also contains metil-chavicol and other substances.
The fruit of the fennel and the essential oil it contains is frequently used in infant health care for its antispasmodic and carminative effects. It is often used in carminative, digestive, expectorant, choleretic and laxative tea mixtures. Its essential oil is also used by the liqueur and perfume industry. Sometimes young shoots and roots are also used.
Its spindle shaped root penetrates deeply in the soil. Its erect stem grows to be 150-220 cm tall. The pale green leaves are multiply compound. The flowers are small, vivid yellow, the inflorescence is a flat compound umbel. The cylindrical, pointed, green or brownish grey fruit is 6-10 mm long schizocarp (diachaenium). Thousand grain mass is 4-8 g.
Environmental Requirements
Fennel prefers a warm and sunny climate. Sufficiently quick germination requires a soil temperature of 15-16 oC. When the soil is not covered by snow in the winter, the stand is often killed fully or partially. Fennel needs warm conditions (20-23 oC) during flowering and the maturation of fruits. It is best grown in rich, well drained loams or sandy loams.
The water uptake of fennel is highest between stem extension and flowering. The setting of fruits will be poor if the weather is cold and rainy during flowering.
Forecrop
The best forecrops for fennel are cereals and well fertilised row crops. The field must not be infested with field bindweed (Convulvulus arvensis) or jimson weed (Datura stramonium).
Soil Preparation
Soil preparation starts by ploughing in the autumn, followed by cultivation in the spring. By March, create a sufficiently moist, fine textured seedbed.
Fertilising
Fennel produces extreme amounts of vegetative green biomass annually (40-60 t/ha), for which the plant needs plenty of nutrients. Winter survival is reduced both by excess and low amounts of nitrogen. A balanced fertilising regime is based on sufficient amounts of nitrogen and potassium as well as trace elements. When the soil is prepared in the autumn, apply 80-100 kg/ha of phosphorus and 40-60 kg/ha potassium in the form of artificial fertilisers. From the second year, the application of 20-40 kg/ha nitrogen is recommended early in the spring. If fennel is allowed to stay for the third year, apply artificial fertiliser (phosphorus: 40-60 kg/ha, potassium: 30-40 kg/ha) after harvest in the autumn of the second year.
Propagation
Fennel survives for 4-5 years in Hungary, but it gives sufficient yields only in the first and the second year, sometimes also in the third year. Generally, it is kept in cultivation for 2 years.
As the fruits mature late in the first year and maturation is not always granted, fennel should be sown as early as allowed by the condition of the soil, i.e. at the beginning of March, at a row distance of 42-48 cm and a depth of 2-3 cm. Seeding density should be 9-11 kg/ha.
Fennel may also be sown at the beginning of November. In this case, seeds will germinate early in the spring, when soil temperature reaches 6-8 oC. When fennel is sown in the autumn, there is an increased chance that the fruits will be able to mature.
Plant Care
Spray with Merkazin (4-5 kg/ha) or Stomp 330 EC (4-6 l/ha) for pre-emergent wed control. For weed problems emerging later in the season, use Afalon (2 kg/ha) but only when the fennel has grown taller than 15-20 cm.
In 2 and 3 year old stands, use Merkazin and Stomp before the shoots emerge in the spring. At a shoot length of 10-20 cm, use Afalon (2 kg/ha).
Pay special attention to the control of toxic and quarantine weeds (jimson weed, hemlock, field bindweed, henbane (Hyosciamus niger)).
Pest Control
The most important insect pests of fennel are various lygus bugs, their sucking may cause a yield loss as severe as 80-90% in dry years. They may be controlled by bee friendly insecticides only, such as Zolone 30WP (1-1.5 kg/ha). To prevent damage, the application of Nurelle D 50/500 EC (1.2-1.5 kg/ha) may be recommended. Using these insecticides when the buds appear will provide efficient protection also in the flowering period.
Fennel may also be occasionally damaged by Depressaria nervosa.
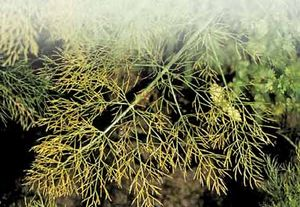
In the wet Western European region, several necrotic diseases have been mentioned lately. Anthracnose (Mycosphaerella anethi) has had outbreaks in Hungary, too. This disease maybe controlled by repeated applications of Topas 100 EC.
Harvest
Fennel is difficult to harvest due to its massive volume of vegetative party (stems, leaves) and the late maturation of the fruits. In the first year, fennel is usually harvested in October, whereas in the second and third years already in September. Fennel may be harvested in a single cut (by combine harvester) if the majority of the fruits are in the wax-ripe stage and they cannot be crushed by finger. When harvesting in a single cut, the header of the harvester should be set in a way that it cuts most of the ripe umbels but leaves the thick stems on the stubble. The stubble should be cut by a shredder in the same autumn.
The fruit collected by the combine harvester should be dried in almost all cases (drying temperature must not exceed 40 oC). Expected yield is 0.4-0.6 t/ha in the first year and 1-1.5 t/ha in the second year.
Processing
The moisture content of the yield should be reduced to 10-15% by drying. Use an industrial grain dryer with unheated air. After drying, the yield should be cleaned (mechanically) as soon as possible. Fruits should be separated from waste, using sieves or vibrating separator.
The drug should be stored in a dry, clean, well ventilated room, away from any foreign material with a strong smell.
General Quality Criteria
The drug may contain the dried schizocarps of fennel. The drug may not contain toxic or harmful plant parts. Its colour is a greyish greenish brown and it should have a characteristically pleasant odour and a sweet, somewhat spicy taste. The drug may contain stems and leaves, foreign plant material and inorganic foreign material in 1-2%, 2-3% and 0.5-1%, respectively. Fennel as Class I commercial herb should have 93-95% purity.
The drug may contain maximum 10% moisture. Minimum essential oil content for both the drug and the herb is 3%.
Quality criteria for the drug are prescribed by the European Pharmacopoeia and the Eighth Hungarian Pharmacopoeia
Recommended Times for Checking and Consultation
1. In the spring, at the time of soil preparation, sowing and chemical weed treatment (middle of March).
2. At the beginning of the flowering period, sample and prevent insect damage (July).
3. Before harvest, assess yield, determine harvest time (September, October).

Cultivation of Marshmallow (Althaea officinalis)
Marshmallow is a perennial plant which belongs to the mallow (Malvaceae) family. Its rhizome develops straight or branching roots of 10-30 cm length and 2-3 cm thickness which are grey on the outside and whitish inside. The stem is 80-130 cm tall, woody at its base. The alternate leaves are 3-5 lobed and velvety to the touch as a result of the dense hair covering them. Flowers are white or pale pink; marshmallow flowers between July and September. The fruit is composed of 15-20 disk-like parts. Thousand grain mass is 1.6 – 3.2 g.
The parts used as medicine are the root (Althaeae radix) and the leaves (Althaeae folium). Sometimes inflorescences and shoots with leaves and flowers are also processed. Roots contain 10-12% mucus, for the leaves and flowers it is 5-10%. The mucus is used to cure digestive or respiratory problems (gastro-enteritis), as a demulcent for the inflammation of mucous membranes. The root drug is used in teas, tea mixtures, as a water extract or syrup, against coughing, respiratory problems, bronchitis and sore throat.
Environmental Requirements
Its original habitats include alluvial areas, wetlands, marshes, roadside ditches, etc. It prefers low lying fields and wet, fertile, not too compact soils. It can be grown under warm, sunny as well as wet climatic conditions. Germination starts around 20 oC.
Forecrop
Marshmallow is perennial but is mostly grown as an annual, so it does not stay in the field for more than 2 years. When designing the crop rotation, it should be considered that marshmallow is removed from the field only very late in the season (at beginning of November). It is best grown after row crops that have received organic manure as the plant effectively utilised the delayed benefits.
Soil Preparation
Direct seeding requires autumn ploughing followed by seedbed preparation in the spring. The soil should be prepared as if for a garden by the beginning of April, with a texture of fine granules. It is essential to preserve soil moisture so frequent disturbance should be avoided; it cultivation is necessary below seeding depth, apply a roller on the field afterwards. Marshmallow needs a smooth and compacted seedbed.
Fertilisation
Incorporate 20-30 t/ha organic manure into the soil in the autumn. In the lack of such application, use an artificial fertliser with 40-50 kg/ha nitrogen, 50-60 kg/ha phosphorus and 80-100 kg/ha potassium. At stem extension, apply a nitrogen fertiliser again (30-40 kg/ha).
Propagation
Marshmallow may be grown both by direct seeding or transplanting; sometimes it is propagate vegetatively, by root cuttings.
Direct seeding
Marshmallow seeds germinate at a low rate only in the first year. Use 2-3 year old seeds instead. Before sowing, pre-germinate seeds to test their germination capacity. Germination is slow, may last as long as 3-4 weeks. Sow seeds in the spring (at the beginning of April)or in the autumn (at the end of October, beginning of November). Sow at a row distance of 50-70 cm and depth of 2-3 cm. About 4.5 – 6 kg seeds are needed per hectare.
Raising transplants
Sow the seeds at the beginning of April, into well prepared soil outside, at a row distance of 20-25 cm. Seeding density should be 10-15 g/m2. Seeded beds and transplants should be carefully irrigated. Transplants may be planted out in May, at a row and plant distance of 50-70 cm and 20-25 cm, respectively.
Propagation by root cuttings
Root cuttings are collected during harvesting. Select rhizome pieces are at least 3 cm long, with 1-2 sprouts. Plant them to a depth of about 10 cm. Row distance is again 50-70 cm.
Plant Care
Directly seeded plants should be thinned when they have developed 2-3 true leaves. Set plant distance to 20-25 cm. Mechanical (mechanised or manual) inter-row weed control is essential. Inter- and intra-row weeding should be performed 2-3 times in the vegetative season in transplanted stands.
Pest Control
Marshmallow is frequently attacked by mallow rust. Upon sighting, spray with Tilt (0.8 – 1 l/ha), Vigil (1 – 1.2 l/ha) or Impact (1 – 1.2) l/ha. Repeat the treatment when necessary. 2-3 weeks later. Another common disease of marshmallow is Fusarium wilt. It may be controlled by the carefully selecting the site and the forecrop. Fields infested by Fusarium in previous years are not suitable for marshmallow production. Seed treatment with kaptan, benomyl, or mancozeb may also provide protection.
The most important insect pests of marshmallow are flea beetles. Use Bancol 50WP (500SC), Sevin 85WP or Ravion 85WP against them.
Harvest
Marshmallow leaves may be continuously collected from the beginning of the flowering period. Mature, pest-free leaves (not wilted, not infested by rust) are to be collected. When the roots are planned to be harvested, the collection of leaves is not recommended. Roots may be harvested from two year old (sometimes one year old) stands, in November. Roots may be harvested by manual digging on small fields or by a plough without mouldboard or a sapling puller from larger areas. Before collecting the roots, the shoots should be removed. Use a swath cutter, stem cutter or sugar beet topper or some manual tool for the purpose.
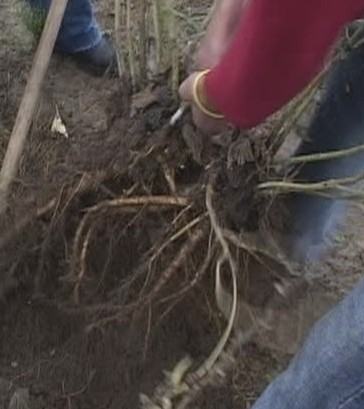
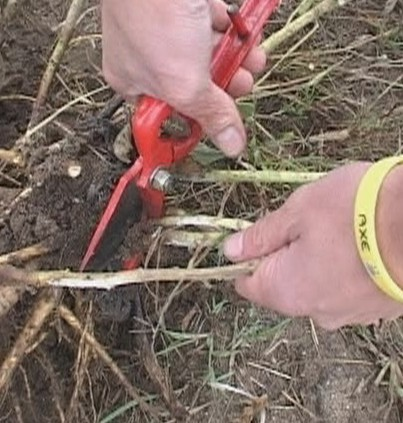
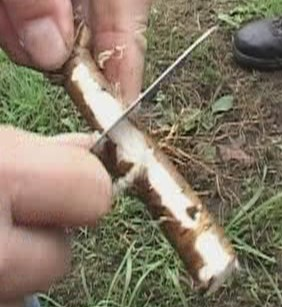
Processing
The manual processing of the root drug is labour intensive. Roots should be cleaned from the soil first (sand and soil particles are preferably removed already during harvest) then they should be peeled. Use a sharp knife to remove the outer, greyish brown cortex. Roots should be left then for a few hours to dry, then they are chopped. Roots are cut first longitudinally to bars, then chopped to cubes of 5 by 5 mm by knife or a cutter. The chopped root material is dried till its water content falls to 12%. The dried drug may be stored for an extended time; its mass is reduced to one third or one quarter of that of the fresh material. Leaves are dried at 35-50 oC. 4-6 kg fresh leaves yield 1 kg dry leaf drug. Do not store dry leaves in plastic bags as they may go stale.
Expected yield: 1-1.4 t/ha dry root material in the second year, 400-500 kg/ha dry leaves.
General Quality Criteria
The root drug (Althaeae radix) and the leaf drug (Althaeae folium) are registered in the VIII. European Pharmacopoeia.
The root drug is white, it tastes sweet. When submerged in water, it readily becomes mucous. According to Pharmacopoeiaia criteria, the root drug may contain maximum 1% foreign material; this limit is 3% for the leaf drug. The proportion of leaves infested by mallow rust may not exceed 3% in the leaf drug. Its nutritional value is determined by its swelling index, its value should be 15 for the root drug and 10 for the leaf drug. The proportion of unpeeled root sections must not exceed 1% in the case of the Class I root drug, and 15% and 40% for Class II and Class III root drugs, respectively.
Recommended Times for Checking and Consultation
1. At soil preparation and fertilising (end of October), alternatively at the autumn sowing (beginning of November)
2. At direct seeding or seeding for transplants in the spring (beginning of April),
3. At the thinning of the direct seeded stand (end of May, beginning of June)
4. Pest control interventions (July)
5. At the beginning of collecting leaves, at the beginning of drying (July)
6. At the beginning of root harvest (November)
7. At the beginning of processing (November).
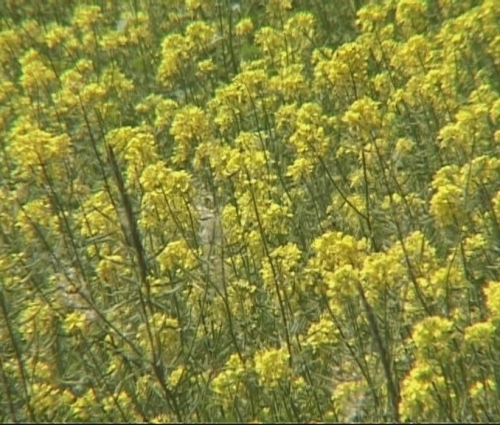
Cultivation of White Mustard (Sinapis alba) and Indian Mustard (Brassica juncea)
Cultivated mustard species belong to the genera Sinapis and Brassica within the cabbage family (Brassicaceae).
The seed of mustard species is used as an important seasoning ingredient by the canning industry. Ground mustard seed is used to make a poultice to mitigate the symptoms of rheuma. Its essential oil is used by the cosmetics industry. The active ingredients of mustard species are mustard glycosides (these are the most important), essential oils, fatty oils and mucus.
The most frequently grown cultivated mustard species in Hungary are white mustard (Sinapis alba) and Indian mustard (Brassica juncea).
The cylindrical stems of white mustard are 60-100 cm tall. Its leaves are petiolated (stalked) and incised. The golden yellow flowers grow in terminal racemes. Its fruit is a 3-4 mm thick and 20-40 mm long hairy silique. Each silique contains 3-6 yellow seeds.
Thousand grain mass is 4 – 8 g.
Indian mustard has smooth, 80-160 cm tall stems. Its leaves are broad and incised at the base and elongated and sinuate towards the tip. The sulphur yellow flowers grow in terminal racemes. Its fruit is a 2-2.5 mm wide and 30-50 mm long, smooth silique. Each fruit contains 10-12 reddish brown seeds.
Thousand grain mass is 2.5 – 3.0 g.
Environmental Conditions
Both species have a short vegetation period (for the cultivated varieties, 104-135 days in Hungary). Mustards are not demanding plants regarding soil. When properly fertilized, they grow well in almost all types of soils except for dry sands and salty alkaline soils. Seeds readily germinate at 4-5 oC. When selecting the field, it important to keep a distance of 500 m from conspecifics or related species and have the field free of Avena fatua, Sinapis arvensis, Raphanis raphanistrum and Cuscuta sp.
Forecrop
Do not grow mustard after itself, rape, maize, sunflower and other plants that leave lots of seeds and weed behind. Mustard should not be grown after potato, green pepper, cabbages and legumes either.
Soil Preparation
The most important technological step of cultivation is soil preparation as this is the factor that has the most significant impact on the quality and quantity of yield (beside the climate, of course). To facilitate early sowing, autumn ploughing is essential. To prepare a smooth seed bed, level the soil by dragging. Before sowing, cultivate the soil with comb harrow and combinator to provide for a uniform sowing depth as well as mechanical weeding. After sowing, the use of a smooth roller combined with a smoothing harrow is recommended.
Fertilization
Data required to calculate the necessary amount of fertilizers:
a) specific nutrient needs of mustard:
N(nitrogen) 5 kg/100 kg seed
P2O5 (phosphorus) 2,5-3 kg/100 seed
K2O (potassium) 4 kg/ 100 kg seed
b) soil nutrient analysis.
According to the nutrient needs above, mustard needs 75-150 kg/ha of N, 80-100 kg/ha of P2O5 and 30-40 kg/ha of K2O. Fertilize in the autumn, parallel with soil cultivation. One third of the nitrogen dose (25-50 kg/ha) should be applied in the spring, before sowing.
To prevent nutrient deficiencies, leaf fertilizers containing trace elements may be successfully applied (Wuxal, Peretrix). Apply leaf fertilizers 7-10 days prior to flowering (3-4 l/ha), then apply the same dose again after the setting of siliques.
Propagation
The quantity of yield and sowing time show a close correlation. Stands sown early, before the end of March proliferate thus yield more. The amount of seed needed for a hectare is 12-15 kg for white mustard and 8-10 kg for Indian mustard. The amounts of seeds actually sown are always determined by local soil and precipitation characteristics. Mustard is sown by the sowing machines used for cereals. Row distance is 24-30 cm, sowing depth 1-1.5 cm.
When sowing mustard, use treated seed if possible (0.6-0.7 l/100 kg Hostathion 40 EC).
Plant care
For pre-sowing chemical weed control, use Treflan 48 EC, Olitref 480 EC (1.6 – 2 l/ha). These chemicals are volatile so they need to be incorporated into the soil immediately. Buvilan 33 EC is similar to these in its efficiency, however, it does not have to be incorporated into soil and may be used both before and after sowing.
Pest Control
Mustard is regularly attacked by flea beetles, the common pollen beetles (Meligethes aeneus) and the larvae of the turnip sawfly (Athalia rosea). Use Sumithion 50 EC or Danatox 50EC against the flea beetles upon detecting them (usually when the seedlings emerge).

Image source : http://www.kwizda.hu/
The most harmful pest of mustard is the turnip sawfly as its larvae may cause significant damage within a few days by chewing the tissue between the veins.
When many larvae are present, they can also damage flower parts and siliques. Sawfly larvae attack around the flowering period so use insecticides non-toxic to bees only. Spray the active ingredient phosdrin in a dose of 1.6 – 1.8 l/ha before flowering. In the flowering period, Decis 2,5 EC, Karathe 5 EC, Bancol 50 WP are allowed. These insecticides also kill the common pollen beetle that chews on blooms and carpels. As a result of the damage, flowers drop or develop misshaped siliques. If needed, spray with Pirimor (0.8 – 0.9 kg/ha) against aphids.


Earthworm and its damage to cabbages
Images from own source (www.plantprotection.hu)
Harvest
Mustards should be harvested in the second half of July or at the beginning of August. Mustards are harvested in a single cut system, using grain harvesters. An important step of preparing for harvest is setting the harvester properly to avoid breaking the seeds and seed loss:
Ø reduce the rotation of the threshing drum
Ø fit the harvester with rubber coated beater bars
Ø increase the opening of the threshing concave
Ø adjust sieve size for small grain
Ø adjust air flow
Ø optimize ground speed.
Select harvesting date with great care. By the time of harvesting, seeds should be completely ripe, hard and bear their specific colour. Start harvesting when the siliques yellowish brown and the stem beneath them snap.
Grain loss by shattering dry siliques may be reduced by harvesting in the morning.
Expected yield for white mustard: 0.6 – 1.2 t/ha,
Expected yield for Indian mustard: 0.9 – 1.5 t/ha.
Processing
The grain from the combine harvester should be immediately pre-cleaned. Remove green parts to reduce the risk of the batch getting moist. Dry the batch immediately if its moisture content is higher than. Drying temperature may not exceed 40 oC in the case of artificial drying with hot air, however, in most years the weather at harvest allows for cool air drying. After drying, clean the grain as fast as possible. Cleaned and dry mustard seed may be packed in sacks. Store the sacks in a clean, well ventilated room away from insects and rodents.
General Quality Criteria
White mustard
The diameter of the round, pale yellow or yellowish brown seeds is about 2 mm. Their surface is finely dotted. When moistened, the mucus in the epidermis (skin tissue) of the seed swells. The drug is odourless, it tastes oily at first, then hot, spicy when chewed.
The drug may contain only the seed of white mustard. Class I and Class II drugs may contain maximum 1% and 2% of other parts of the plant, respectively.
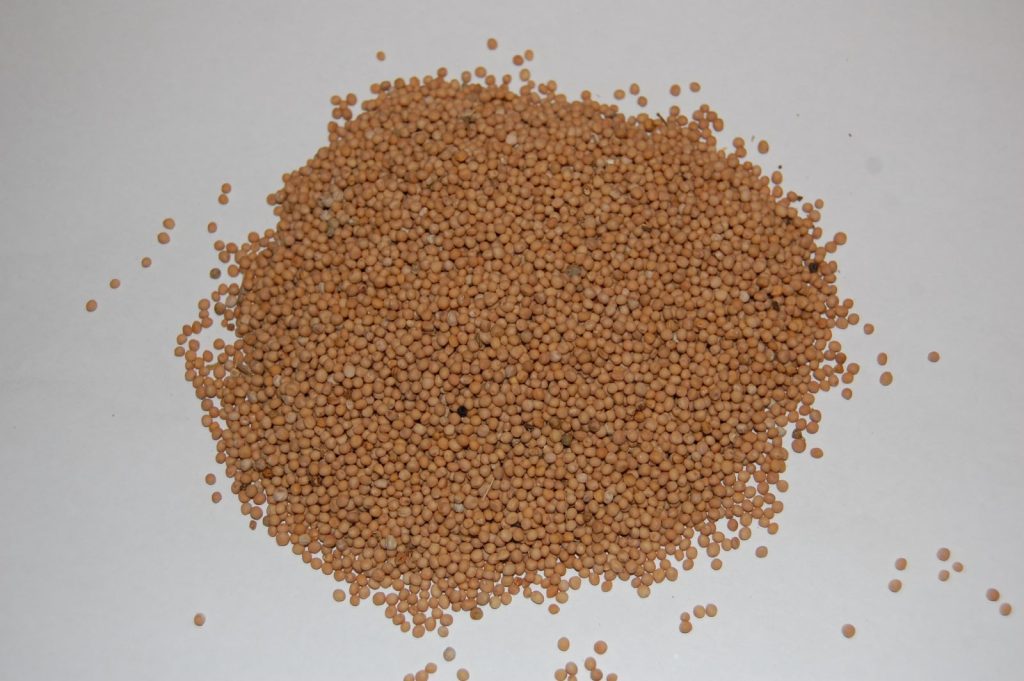
The drug must not be musty or mouldy and it should be free from off-odour. The drug must not contain toxic or harmful plant parts or foreign matter, neither should it contain plant protection products or their residuals. Class I and Class II drugs may contain maximum 1% and 2% of foreign matter, respectively.
Indian mustard
The diameter of the round, reddish brown seeds is about 1.4-1.8 mm. The drug is odourless, it tastes rather bitter at first, then hot, spicy when chewed.
The drug may contain only the seed of Indian mustard. Class I and Class II drugs may contain maximum 1% and 2% of other parts of the plant, respectively.
The drug must not be musty or mouldy and it should be free from off-odour. The drug must not contain toxic or harmful plant parts or foreign matter, neither should it contain plant protection products or their residuals. Class I and Class II drugs may contain maximum 2% and 4% of foreign matter, respectively. The drug must not contain the brownish, smooth seeds of turnip mustard (Brassica rapa L.) that taste less hot when chewed, nor the seeds of wild mustard (Sinapis arvensis L.) or the severely toxic seeds of autumn crocus (Colchium autumnale L.).
Recommended Times for Checking and Consultation
1. Before flowering, at the beginning of June, sample for pests and the damage caused by them, selection.
2. Before harvest, in the second half of July.

Cultivation of German chamomile (Matricaira recutita)
German chamomile is an overwintering annual herb. It belongs to the sunflower family (Compositae). Its root is long, spindle shaped, weakly branching and does not penetrate deep into the soil. The stems are cylindrycal, erect or lay on the ground, they are 50-80 cm tall depending on growing conditions. Its bipinnate or tripinnate leaves are non-petiolate, bare and laciniate. Its composite flower head (calathidium) develops at the top of the stalk, the swollen receptacle is hemispherical at first, then becomes elongated, conical and hollow. The inflorescence is composed of 12-18 white ray female florets and several yellow bisexual disc florets located in the middle. The flowering season lasts from the second half of April till the beginning of May. In the main flowering season, the white ray florets are perpendicular to the flowering axis, taking a horizontal position. The fruit is a 1-1.5 mm long greyish white achaenium. Thousand grain mass is 0.02-0.07 g.
The flower drug (Matricariae flos) is used in various teas, extracts and tinctures. Chamomile is a well-known anti-inflammatory and antispasmodic. It treats the inflammation of the mucosa of the stomach and the guts as well as ulcers effectively. In the case of respiratory symptoms, chamomile is used for inhalation. It is used externally as well, as a compress for the eye, or to treat the gum or other wounds. Its essential oil is also used by the cosmetics industry, in skin and hair products and soaps.
The active ingredients of the drug are the essential oil, with chamazulene as the main ingredient, bisaboloids and non-volatile compounds such as flavonoids and mucus.
Environmental Requirements
Chamomile prefers a warm climate and requires a great deal of light. It is draught tolerant but precipitation is essential for germination and stem extension. Chamomile is a characteristic plant of saline soils so it had been considered a salt-preferring plant for a long time before it was found that the plant simply tolerates sodium salts, it prefers however rich soils where it develops much better. It grows well in virtually any type of soil, however, it is economically more sound to grow it in areas that cannot be utilised by other cultivated plants.
The seed remains fertile for 2-3 years, but it is able to create weed problems for as long as 10-12 years once its seeds get into the seed bank in the soil. Germination, starting already at 6-7 oC, requires light. Uniform germination, however, may be expected only at 20-25 oC.
Forecrop
Chamomile is best grown in a temporal monoculture, i.e. at the same place for 4-5 years. It does not mean of course that it has to be sown only once in this period but refers to the fact that the plant may return to the same field for 4-5 years. It is not sensitive to its forecrop, it may follow any other crop as long as the field is not infested with weeds too severly.
Soil Preparation
The preparation of a quality seedbed is of paramount importance. Once the forecrop (the previous chamomile crop or some other plant) has been removed from the field, the soil should be disk tilled (or ploughed shallowly), then a compact seedbed with a smooth surface should be prepared by running a roller on the field.
Fertilisation
Chamomile needs fertilisation in the first year only on poor sandy soils. From the second year onwards, apply phosphorus (60-70 kg/ha) potassium (50-70 kg/ha) and nitrogen (10-40 kg/ha) before sowing. In the spring, apply 40-60 kg/ha nitrogen. If we fail to apply fertilisers, chamomile will ”disappear” from the field from the third year, as it depletes the nutrient reserves in the soil. (The fertlisation regime described above applies to monocultures.)
Propagation
Optimum seeding time is the end of August or the beginning of September in Hungary. (When sown in the spring, it hardly yields half as much even if seeding is scheduled as early as possible.) Chamomile seeds need light for germination, so the seeds should be scattered on the soil surface. Chamomile seeds are sown in the form of a mixture (30% fruits and 70% dry ray florets), in a volume of 9-10 kg/ha. In the first year, sow good quality, unmixed fruits in a volume of 3 kg/ha.
When chamomile is sown, the coulter is lifted or a skid seeder is used. Row density is 12 cm. Running a roller after sowing is essential. Do not use a harrow comb to cover the seeds. In small fields, seeds may be sown manually, but a roller should be applied also in this case.
 Plant Care
Chamomile may only be grown in a monoculture if chemical weed control is available. In the spring, at the beginning of April, spray with Afalon (2-2.5 kg/ha). Against resistant dicot weeds, use Mecomorn 500SL or Duplosan DP (1.8-2 kg/ha) before stem extension. If it is very sunny on the day of application, spray only late in the afternoon. Against resistant monocot weeds, use Fusilade S (2-4 l/ha).
Pest Control
Chamomile may occasionally be attacked by thrips or aphids at the beginning of the flowering period. Apply the usual insecticides.
Harvest
Chamomile should be harvested when most of the flowers are in bloom and ray florets took their horizontal position, as this is when the active ingredient concentration in the flowers is the highest. As flowering proceeds, essential oil content decreases. Early harvest results in small and few flowers whereas the flower drug from a late harvest tends to fall apart. Chamomile is harvested manually (with handheld comb shaped equipment). Specific chamomile combine harvesters for larger fields are also available. Flower heads should be cut with a short stalk. When stalks are longer, a specific machine is used to remove them. Cut flower heads should be dried immediately. Chamomile for essential oil production is usually harvested by forage choppers. As only the flower heads contain essential oil, cutting height should be set in a way that the harvested material contains as few stalk fragments as possible. Chamomile may be cut once or twice in a season, depending on the weather. The second growth is recommended for use in essential oil production.
Processing
Flower heads collected in the wild may be dried both naturally or artificially. In larger facilities, fresh flower heads are first dried at 50-60 oC, then drying temperature is lowered. Flower heads may also be dried naturally, e.g. by spreading them in a thin layer in a barn loft. In this case, turning is nt necessary so flower heads will not suffer damage. Flower heads dry within 5-6 days in a warm and well ventilated loft. Dried flower heads should be collected by carefully sweeping them into piles.
Combine harvested flower heads are cleaned by special sieves that are connected to the harvester to adjust their performance. First, flower heads with long stalks are removed to be used for essential oil production. Then the flower heads pass through sieves of various mesh sizes and transported immediately to the drying facility. Industrial crop driers are particularly suitable for the purpose. Artificially dried flower heads are destalked after cooling and a rest period.
The flower drug is stored in cardboard boxes.
Expected yield: 0.5-2 t/ha fresh flower heads, yielding 0.1-0.5 t/ha dry flower drug. For essential oil production, combine harvesters collect 4-8 t/ha flower heads with stalks.
General Quality Criteria
The VIII. Hungarian Pharmacopoeia registers the flower head and the essential oil of German chamomile as Matricariae flos and Matricariae aetheroleum, respectively.
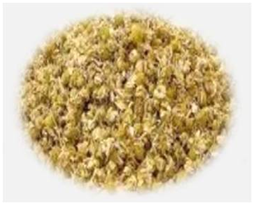
Essential oil content in the flower drug should be minimum 0.4%. The length of stalks on flower heads may not exceed 5 cm. The ratio of leaf fragments may not exceed 5%. The III. sieve fraction may not exceed 10%. The ratio of foreign plant parts may not exceed 4% with the ratio of other chamomile species not exceeding 0.1% within the foreign fraction.
The essential oil should contain chamazulene in at least 2.5% and bisabol in 10%.
Recommended Times for Checking and Consultation
1. Before sowing, at soil preparation, at sowing (end of August, beginning of September)
2. At chemical weed control (beginning of April)
3. When scheduling harvest, at harvest (beginning of June)
4. When scheduling drying, at harvest (beginning of June)
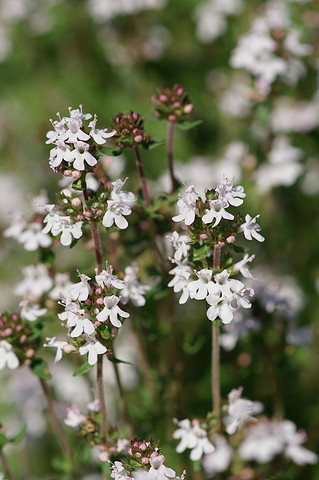
Cultivation of Thyme (Thymus vulgaris)
Thyme is a popular herb that has been used since antiquity. Its drug, the flowering stem, is used in tea mixtures that can thin mucus and treat coughing. The most important active ingredient of its essential oil is thymol, a compound with antibacterial and antifungal properties as well as giving a characteristic odour to the plant. Its alcoholic extract also has antiseptic and mucus thinning properties, thus it is an important ingredient in Galenic preparations. Its leaves are widely used as seasoning for meat and pickles.
Thyme is a perennial half shrub. It originates from Southern Europe. The plant belongs to the mint family. Its complex, densely branching root system is thick and woody. The branching stems are 20-50 cm tall. The decussate, lanceolate leaves are small and covered with dense hair. The spikes are composed of whorl-like inflorescences; the lower ones are remote from the others. The petals are purple or pink. Thyme flowers from the middle of May until the middle of June. The fruit of the plant is a dark brown nutlet, about 1 mm long. Thousand grain mass is 0.25-0.25 g.
Environmental Requirements
Thyme originates in the temperate zone and grows best in a warm and sunny climate. In low lying areas, frost often kills it if there is no snow to protect the plant. Thyme is sensitive to excess moisture and tolerates draught better. The plant prefers not too cohesive, well drained, alkaline soils rich in nutrients. Its seeds germinate already at 10 oC. The optimum temperature for germination is 20 oC. Germination takes 12-14 days.
Forecrop
Thyme has no special requirements regarding its forecrop, however, the field should be kept weed-free. Once removed, do not grow thyme in the same field again for 4 years.
Soil preparation
The field should be ploughed at a depth of 35 cm. Prepare the seed bed in the spring; which must be fine textured and grainy. Keep it weed free till sowing.
Fertilizing
Thyme has high nutrient requirements. The perennial plant stays on the field for 4-6 years. Before planting, 20-30 tons of organic fertilizer should be applied to satisfy its nutrient needs. Apply 50-80 kg/ha K2O (potassium), P2O5 (phosphorus) and 40-60 kg/ha N (nitrogen) in the autumn.
In older stands, 30-50 kg/ha N should be applied in the spring, in the form of nitrogen lime top dressing.
Propagation
Thyme may be propagated by direct seeding or transplantation.
Sow densely (5-6 kg/ha) for a uniform stand. Seedlings develop very slowly in the first 2-3 months. In this period, weeds may be controlled by hoeing and manual weeding only. Direct seeding is labour intensive and requires high quantities of seed, which is why transplanting is more popular.
For transplants, weeds are sown in the middle of March into outdoor beds. For an even distribution, mix 1 part of seeds with 3 parts of sand or perlite. Sow on the surface of the soil and cover the seeds with a 0.5 cm layer of sand. As the surface of the soil dries out easily, irrigate and shade the plot continuously till the seedlings appear. Keep the plot weed free as the seedling develop very slowly and weeds may outcompete them. Row distance is 30-35 cm. About 180-200 000 transplants are required for a hectare. Well established, 5-7 cm tall transplants should be planted in groups of 2 or 3, at a plant distance and row distance of 50 cm and 25 cm, respectively.
 Thyme is a perennial half shrub. It originates from Southern Europe. The plant belongs to the mint family. Its complex, densely branching root system is thick and woody. The branching stems are 20-50 cm tall. The decussate, lanceolate leaves are small and covered with dense hair. The spikes are composed of whorl-like inflorescences; the lower ones are remote from the others. The petals are purple or pink. Thyme flowers from the middle of May until the middle of June. The fruit of the plant is a dark brown nutlet, about 1 mm long. Thousand grain mass is 0.25-0.25 g.
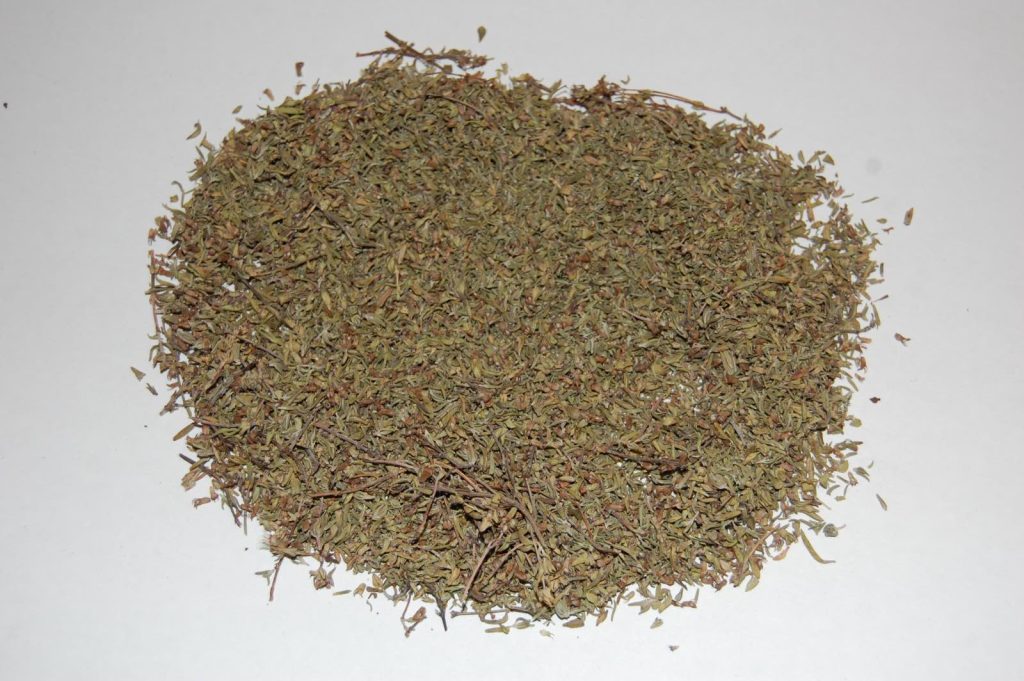
The drug must not be musty or mouldy and it should be free from off-odour.
The drug must not contain toxic or harmful plant parts.
The drug must not contain live or dead insects, their larvae, feces or webbing, nor plant protection products or their residuals in toxic amounts.
Essential oil content should be at least cm3 in 100 g drug (1-1.2%).
Thyme is registered in the European Pharmacopoeia.
Recommended Times for Checking and Consultation
1. Determining transplanting date while growing transplants.
2. Determining the necessity, timing and method of chemical weed control.
3. Before the first and second harvest.
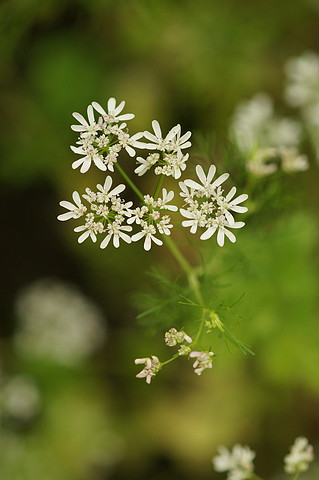
Cultivation of Coriander (Coriandrum sativum)
 Coriander is one of the oldest cultivated medicinal and herbal plants. Its fruit (seeds) is used for seasoning, as well as for flavouring pickles, drinks and meat dishes. The essential oil produced from the seeds is used by the pharmaceutical, food and cosmetics industries. The active ingredient of coriander has an antispasmodic effect on smooth muscles; it is also a carminative and improves digestion.
Coriander originates from the Mediterranean basin. This annual plant belongs to the carrot family (Umbelliferae). Coriander is herbaceous and grows to be 60-100 cm tall. Both the main stem and the secondary ones end in flower clusters. Coriander has tiny white or purple flowers. Its fruit is a round, yellow or yellowish brown schizocarp. Each part of the plant contains essential oil. The stems and leaves have a pungent odour, resembling that of the stink bug. Unlike these parts, the ripe fruit has a pleasant, characteristic, spicy aroma. The main component of the essential oil is linalool, but it also contains borneol, camphor and other compounds.
Environmental Requirements
Coriander is heliophilous, thus it needs a lot of light. It is frost hardy. Germination starts at soil temperatures as low as 8-10 oC. Coriander has its highest water demand in the period between germination and the full development of the rosette. The plants also need lots of moisture once stem extension has started, until the onset of the flowering period. If the plant suffers from draught during flowering and fructification, it will yield significantly less drug. Coriander is not a demanding plant regarding soil but it will give sufficient yields only when grown in a well structured, rich, well drained soil. It is particularly sensitive to the amount of phosphorus in the soil.
Forecrop
Like other umbelliferous plants, coriander fits well into crop rotation systems. Coriander prefers forecrops that do not exhaust the soil and leave the field relatively weed-free, such as green fodder, winter cereals, legumes or potato. Do not grow it after other umbelliferous plants as they might have the same pests and diseases. Once removed, do not grow it in the same field again for 4-5 years.
Soil Preparation
For coriander, always plough in the autumn. Prepare the seedbed as soon as possible in the spring. Soil moisture should be preserved as much as possible during spring cultivation (harrowing, leveling, rolling) and the clods should be broken up to create the optimum conditions for sowing.
Fertilising
Coriander has a high nutrient demand. For 100 kg of seed, average amounts of 4.2 kg nitrogen, 1.6 kg P2O5 (phosphorus) and 4 kg K2O (potassium) are taken up from the soil. Nutrient absorption is most intensive between the stem extension and flowering. In Hungary, the following fertilising scheme yielded the best results:
Ø Application of an artificial fertiliser in a dose of 60-80 kg N, 60-80 kg P2O5 and 40-50 kg K2O (active ingredients) per hectare at the autumn ploughing.
Depending on the nutrient content of the soil, coriander may yield better if an artificial fertiliser is applied in the seedbed at a dose of 10-15 kg/ha N and 10-20 kg/ha P2O5 (active ingredient). Top dressing later in the season is usually not as effective.
Propagation
Coriander is propagated by direct seeding. It should be sown as soon as the condition of the soil allows. Optimum sowing time is middle to late March. Optimum plant density is 50-70/m. For this, seeding density should be 16-20 kg/ha, by a row distance of 25-30 cm. Sow at a depth of 4-5 cm. Use seeds with a higher thousand grain mass (6-6.5 g).
Plant Care
Germination and early development are rather slow. Plant care should therefore focus mainly on weed control. For chemical weed control, spray with Merkazin in a dose of 4-5 kg/ha before sowing. Apply the chemical immediately after sowing the latest, before germination starts. Spray evenly, using 400-600 l of water per hectare. If pre-emergent weed control proves to be unsuccessful, apply Afalon Dispersion (2 l/ha) or Pardner (2 l/ha) when the plants are 10-20 cm tall. These two applications will keep the field weed free for the rest of the vegetation period. Monocotyledonous weeds should be controlled with Fusilade S (2-4 l/ha).
Pest Control
Bacterial diseases (Pseudomonas, Xanthomonas, Ramularia) may cause severe damage.
Symptoms:
Ø the otherwise white flowers turn pink,
Ø increased branching,
Ø inflorescences wither and die.
Experiences show that the presence of sucking pests at the time of stem extension accelerates the spreading of the disease. Thus, apply a combined insecticide and fungicide treatment from the beginning of stem extension till the onset of flowering to prevent the disease. If coriander is infested by (Puccinia petroselini), insecticide treatments should be combined with a fungicide (Vigil, 1 l/ha).
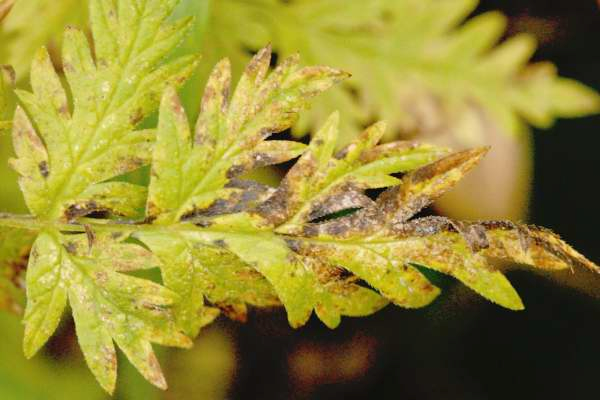
Tapasztalatok szerint a betegség terjedésében nagy szerepe van a szárbaindulás alatt az állományon jelenlévő szívó kártevőknek. Ezért a betegség megelőzése érdekében, a szárbaindulás stádiumától a virágzás kezdetéig, kombinált rovar- és gombaölő szereket alkalmazzunk. Rozsdafertőzés (Puccinia petroselini) fellépése esetén a rovarok elleni permetezést gombaölő szerrel (Vigil 1 l/ha) kombinálva végezzük.
Harvest
Generally, coriander is ready for harvesting by the end of July or the beginning of August. Grain harvesters in a good technical condition are suitable for the purpose. Coriander may be treated as a single cut or a double cut crop. When harvested in a single cut, a higher grain loss is expected, whereas the yield may be damaged by rain in the case of double cutting. Coriander should be harvested in a single cut if the fruits are fully ripe (they are red and their water content falls below 20%). Double cutting may be started already when only 30-40% of the fruits are ripe, the stems are still green but most of the leaves have already withered. The water content of the fruits is 40-50%. Swath coriander with a swath cutter. Leave a stubble of 20-25 cm. Allow the swaths to dry for 4-5 days (after ripening), then thresh with a combine grain harvester. To reduce grain loss, synchronize the speed of the pickup reel with the ground speed. When threshing, the rotation of the threshing drum should be reduced and the opening of the drum should be increased so that the composite fruits (cremopart) do not fall apart.
The expected average yield is 600-800 kg/ha (fruits) or 7-9 kg/ha (oil). In a good season, the yield may as high as 1-1.5 t/ha (seeds) or 15-25 kg/ha (oil).
Processing
If the water content of the harvested fruits exceeds 12%, they should be dried after threshing. Industrial grain dryers are perfectly suitable for the purpose, but the fruits may also be dried by spreading them out indoors, in a well ventilated room. Turn the batches several times. Once dried, fruit batches should be cleaned from stem remnants and alien plant material (seeds, etc.). Make sure that the round fruits do not fall apart due to mechanical impacts during drying and cleaning as it reduces the quality of the drug.
General Quality Criteria
The drug may contain only the fruit of coriander.
The drug must not be musty or mouldy and it should be free from off-odour. The drug must not contain toxic or harmful plant parts. The drug must not contain live or dead insects, their larvae, feces or webbing, neither should it contain plant protection products or their residuals.

Class I and Class II drugs may contain maximum 1.5% and 2% of other parts of the plant, respectively. Class I and Class II drugs may contain maximum 8% and 10% of separated parts of the cremoparts, respectively.
The quality of the drug complies with the criteria of the Eighth Hungarian Pharmacopoeia if its essential oil content is at least 0.8%.
Recommended Times for Checking and Consultation
1. In the spring, in the period of soil preparation, sowing and chemical weed control (middle of March).
2. Sample insect pests and order the prevention of bacterial diseases after the elongation of stems (May-June).
3. Before harvest (end of July or the beginning of August) estimate the yield and determine harvest time.
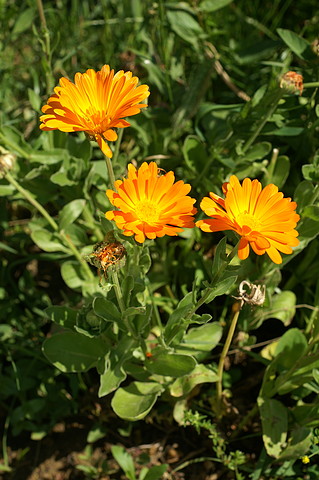
Cultivation of Pot marigold (Calendula officinalis)
 Pot marigold is an annual, herbaceous plant that belongs to the sunflower family (Compositae). Its taproot system penetrates deeply into the soil. Its stem is about 40-70 cm tall, somewhat quadrangular, hairy, branches from the base of the plant, and is light green in colour. Its alternate, elongated, fleshy leaves are hairy, widening towards their tips. The inflorescence is a capitulum (flower head), 4-10 cm in diameter, develops at the top of the flowering stalk. Its colour ranges from bright yellow to orange red. Two types of flowers (florets) are produced, strap shaped ray florets (with carpels) and disc florets. Only the florets located around the edge of the flower head are able to produce fertile achaeniums; the brown fruits are curved like claws, their surface being coarse. Thousand grain mass is 8-12 g.
The active ingredient is found in the inflorescence, these are flavonoids, carotin-type pigments, essential oils and vitamin E. The flower head is used in chloretic tea mixtures and to prevent stomach and gut ulcers. Its extract has a regenerative effects, it is applied externally in cream format to treat wounds. Its pigment is used as a food dye. Bred varieties are kept as ornamental plants.
Environmental Requirements
Pot marigold prefers a warm climate and requires a great deal of light. It tolerates draught but gives a drug yield of sufficient quality and quantity only on well drained, loose soils that warm up quickly. Being half-hardy, it tolerates minor frosts. It is not recommended for low lying, wet fields due the increased risk of powders mildew infestation. Seeds readily germinate at 8-10 oC.
Forecrop
Pot marigold is not sensitive to its forecrop, it may be grown after any plant. The soil should not be infested by perennial weeds. Once removed, do not grow it on the same field for a while, to prevent powdery mildew and Fusarium infestations.
Soil Preparation
Autumn ploughing should be followed by careful and professional seedbed preparation in the spring. Break up the soil thoroughly to a depth of about 5 cm (use a combinator), then compact it again so that the surface can be smooth enough for seeding. This way soil moisture is preserved and germination will be faster.
Fertilisation
It grows well on poor soils as well but for drug production, it needs nutrients. As base fertilisation, apply artificial fertilisers (40-60 kg/ha nitrogen, 60-80 kg/ha phosphorus and 80-100 kg/ha potassium) in the course of autumn cultivation. Do not use organic manure directly, or nitrogen fertlisers in excess amount as it promotes the development of vegetative parts at the expense of the flowers. However, apply top dressing in the period of stem extension and after cutting (40-60 kg/ha nitrogen)
Propagation
Pot marigold has a long vegetative season, flowering till the onset of the autumn frosts. The continuous hand picking of flowers, a rather labour intensive process, is most feasible at family farms.
The seed of pot marigold (i.e. the aechenium) should be sown early in the spring, in March, as soon as the soil allows and soil temperature has risen to 8-10 oC. Sow at a row distance of 40-50 cm and a depth of 2-3 cm.
Seeding density is 6-10 kg/ha. When using a sowing machine form larger areas, check the seed box continuously as the coarse, curved seeds stick to each other, resulting in non-uniform sowing and gaps in the rows later on. Under proper conditions, germination soon starts (within 4-5 days).
 Plant Care
If the stand is too dense, thin it by running a light comb harrow against the rows, when the plants have 3-4 true leaves. Set plant density to 40/m2. Thinning may be done by manual hoeing on smaller fields. In the vegetative period, regular interrow cultivation is needed; the zones between the rows should be hoed once or twice. Control weeds chemically by a pre-sowing application of Maloran + Dual (3 kg/ha + 2 kg/ha) and another dose of Dual at stem extension (3 kg/ha).
At the end of July, beginning of August when flowers are smaller, cut back plants above the first branch (‘’renovation” of the stand) and apply irrigation and top dressing (30-40 kg/ha nitrogen). A month later, plants start flowering again and flower heads may be collected again.
Pest control
The most important pest control task is to protect the stand against power mildew. This fungal disease regularly attacks plants and results in the withering of leaves from the middle of summer. Use sulfur products, such as Kumulus-S, Thiovit-S, Microlux 81 or Kénkol 800 SC. Entyloma smut causes round spots on the leaves. Spots are light green first, then turn whitish, followed by the dropping of leaves. Treat the plants with Perocin 8WP. Rust may occasionally infest top marigold. Apply the usual fungicides in the case of rust attack.
Harvest
Flowering starts at the end of May. Collect flower heads every 3-4 days, till the onset of frosts. The continuous removal of flower heads encourages blooming. Collect flower heads manually, pinching flowers 1 cm below the calyx. Collect flower heads in baskets or directly to the drying frame, in a thin layer, being careful not to break them. Petals (ray florets) may be collected separately, by tearing them from the flower heads.
Processing
To preserve the vivid yellow colour and good quality, dry flower heads immediately. Small amounts may be dried by spreading the flower heads in a thin layer at some well ventilated, shady place. Large amounts of flowers should be dried artificially, at 35-40 oC. The dry drug (with a moisture content of 12%) is strongly absorbent so it should be packaged in cardboard boxes or lined paper bags. Expected yield with the dry calyx included is 1-1.2 t/ha, the expected yield of petals (ray florets) is 0.3-0.4 t/ha.
General Quality Criteria
The VIII. Hungarian Pharmacopoeia (VIII. European Pharmacopoeia) registers the flower drug (Calendula flos).
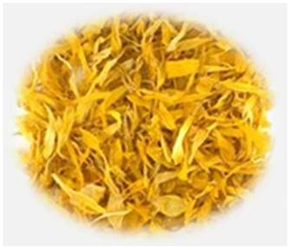
The drug may contain stalk sections maximum 1 cm long. The colour of the Class I drug is a vivid yellow or orange. No criteria apply to the concentration of the active ingredient. The most important active ingredients of pot marigold are water-soluable flavonoids (0,04 – 0,10 %) and the yellow or orange fat-soluable carotinoids.
The drug is included in the list of drugs for free circulation.
Recommended Times for Checking and Consultation
1. At spring cultivation, during sowing (middle of March)
2. At the beginning of flowering, during the collection of flowers, at the beginning of drying the drug (end of May)
3. When the stand is cut back (end of July).
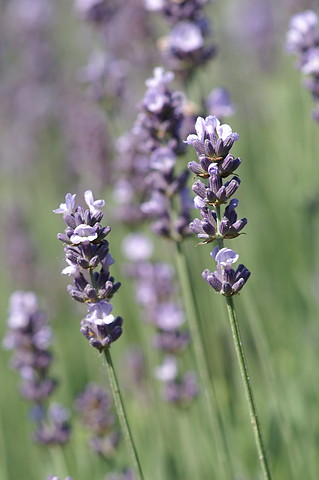
Cultivation of Lavender and hybrid lavender (Lavandula angustifolia, Lavandula intermedia)
 From the species of the genus, true or English lavender (Lavandula angustifolia) and the hybrid or Dutch lavender (Lavandula intermedia) have the greatest significance. The active ingredient of lavender is its essential oil that is concentrated in the inflorescence. The drug is composed of the flowers collected in the period of full flowering and then dried (Lavandulae flos). The major components of the essential oil (Lavandulae aetheroleum) are linalyl acetate and linalool. The drug is used for the treatment of spasms; it is also a digestive, a tranquiliser and may be used externally to cure rheuma and neuritis. The tea made from the flower drug is used as a tranquiliser to treat the symptoms of nervousness, tension and stress. The drug had a chloretic effect. The essential oil is used by the cosmetics and perfume industries.
Both the species and the hybrid are perennial subshrubs and belong to the mint family (Lamiaceae).
True (English) lavender
Its densely branching root penetrates as deep as 3-4 m into the soil. The stem is stout, covered by brown cortex. The plant is bushy and spherical. A mature lavender bush is about 40-60 cm; it is 80-100 cm in diameter. The leaves are linear or narrow lanceolate, 3-5 cm long and 0.2-0.5 cm wide. The cylindrical inflorescence is composed of loose whorls on a spike. The flowers are ”lavender blue” but some specimens may develop pale blue or even white flowers. The fruit is a nutlet. Thousand grain mass is 0.8 – 1 g. Essential oil concentration is 0.5-4%.
Hybrid (Dutch) lavender
Its branching root system penetrates deeply into the soil. The plant grows to be 80-100 cm tall, sometimes with a diameter of 150 cm. The leaves are linear or narrow lanceolate, 5-7 cm long and 0.8-1 cm wide. The inflorescence is composed of whorls densely packed on a spike. The flowers are ”lavender blue” with a greyish tinge. It does not develop fertile seeds. Essential oil concentration is 1-9%.
Both species live long, for about 20-30 years. They are usually kept in cultivation for 15-17 years.
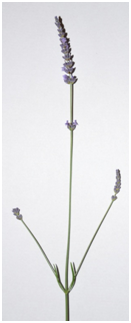

True lavender Hybrid lavender
Environmental Requirements
Lavender is draught tolerant. It prefers dry, alkaline, moderately compact soils. Lavender prefers a warm climate and requires a great deal of light. It is a hardy plant, and frost harms it only in dry and very cold winters. Late frosts may kill the fresh shoots, when active growing has already started in the spring. Both species are grown best on dry southern slopes.
Forecrop
Being present on the field for 15-20 years, lavender is not included in the crop rotation schemes. Lavender is not sensitive to forecrops but makes a poor forecrop itself, leaving a weedy field behind when removed.
Soil Preparation
Lavender stands are established to last for 15-20 years, so preparations should begin a year before actual planting.
Main tasks:
· landscaping as necessary
· deep ploughing in the autumn combined with the application of organic manure (35-50 t/ha)
· soil cultivation from spring to summer or green manure production followed by incorporation
· shallow ploughing combined with the application of artificial fertilisers (phosphorus and potassium) 1.5-2 months before planting
· preparation of a smooth planting bed with fine particles (disk tilling, harrow combing, possibly roller application)
Fertilisation
In addition to the organic manure, 70-90 kg/ha phosphorus and 100-120 kg/ha potassium are generally incorporate into the soil before planting. Producing stands require 60-100 kg/ha nitrogen, 50-60 kg/ha phosphorus and 80-120 kg/ha potassium annually. Overfertilising, especially from nitrogen, may reduce flower production.
Propagation
True lavender may be propagated by sowing or woody cuttings. Dutch lavender may only be propagated by cuttings.
Propagation of true lavender by transplanting:
Transplants are best grown outside. Use a field for the purpose that can be irrigated. Seeds should be sown at the beginning of November (winter seeding). When sown in the spring, seeds need to be refrigerated first. Sow at a row distance of 20-40 cm and at a depth of 1-1.5 cm. Seeding density is 5-9 kg/ha, from which 500-800 thousand transplants are gained.
Plant care for transplants:
· regular irrigation and weeding
· cutting back to promote bushiness, first when the flower buds appear, a month later and at the end of summer.
Propagation of true and Dutch lavender by cuttings:
Both species are able to produce cuttings for propagation. Cuttings are usually planted into outside beds (rarely into propagation boxes) for rooting. Roots will develop sufficiently only if the cuttings can be irrigated. In Hungary, cuttings are left for rooting between spring and autumn. Cuttings are cut in the spring (at the beginning of April) from the mother plants. The best cuttings are cut from 15-18 cm long tips with a woody base. Cuttings are planted at a row distance of 10-15 cm and plant distance of 5 cm. They are inserted into the soil or the growing medium of the propagation box at a depth of 5-8 cm.
Plant care for cuttings in the rooting period:
· regular irrigation (more frequently in the beginning than later)
· regular mechanical weeding
· cutting back when 12-15 cm tall, first when the flower buds appear then as necessary (when flowering starts again), in every 3-4 weeks.
Rooted cuttings should be lifted directly before transplanting.
Planting:
Planting is best done in October. Spring planting results in gaps in the rows and reduced productivity.
Row and plant distances depend on the working width of the machines used for plant care. True lavender is usually planted at a row distance of 1-1.5 m and a plant distance of 50 cm. Dutch lavender needs more space (row and plant distances of 180 cm and 60 cm, respectively).
 Plant Care
· A unique plant care intervention in newly planted stands is cutting back. In the first year, plants should be cut back at the beginning of June when the first flower buds appear, at a height of 10-12 cm. In the second year, plants should be cut back at a height of 15-18 cm, immediately before active growth starts. Cutting is best done with the same machine we intend to use for harvesting.
· Loosening the soil between the rows is essential in producing stands, 2-3 times a year.
· Several herbicides are available for chemical weed control. Use 3-4 kg/ha Merkazin in 1-2 year of stands before the vegetative period. When monocot weeds appear, Fusilade (1.8-3 kg/ha) may be used already in the first year, before the flower buds appear. From the third year, Hungazin DT may be used (3-4 kg/ha) but only in the autumn months (end of October, beginning of November). For resistant dicot weeds, use Statane 250EC (1.2 – 1.5 l/ha) before the start of the vegetative period.
Pest Control
Lavender has no known pests in Hungary, chemical control therefore is not necessary.
Harvest
Lavender should be harvested in full bloom, when the concentration of essential oils in the flowers is the highest. This optimum period lasts 7-8 days so harvest should be started already at the beginning of the flowering period in larger stands. Only the inflorescence should be cut as both the essential oil and the flower drug is produced from this plant part. Cutting may be done manually, with specialised lavender harvester or a cutter loader specifically modified for the purpose.
Processing
When producing flower drug, cutting is followed by drying (e.g. in an industrial crop dryer). Flowers then should be removed from the stems and cleaned from stem remnants (send the batch through a seed grader). When producing essential oils, the inflorescences should be distilled immediately after cutting.
Expected yields depend on the age of the stand. Expected fresh flower yield in the year of planting is 0.6-0.7 t/ha (Dutch lavender: 1-1.5 t/ha), 1.5-2 t/ha in the second year (Dutch lavender: 2.5-3 t/ha), 3-3.5 t/ha in the third year (Dutch lavender: 4-4.5 t/ha) and 3-4 t/ha in the years after (Dutch lavender: 5-7 t/ha). Generally, 8-10 kg of fresh flowers yield 1 kg dry drug.
The expected essential oil yield is 3-6 kg/ha in the second year, then 20-25 kg/ha from the fourth-fifth year (Dutch lavender: 50-70 kg/ha).
The flower drug should be stored in cardboard boxes whereas the storage of the essential oil requires a sealed vessel. The essential oil should be protected from light.
General Quality Criteria
The dry flower drug (Lavandulae flos) and the essential oil (Aetheroleum lavandulae) are registered in the VIII. European Pharmacopoeia.

The flower drug has a characteristic, pleasant odour. It may contain other plant parts in maximum 5%. The ratio of grey flowers may not exceed 10% and the drug may contain maximum 1% of foreign plant parts. Essential oil concentration should be at least 1.5 ml/1000 g drug.
The essential oil of true lavender is yellow or greenish yellow, its pleasant odour resembles that of the lavender itself.
Recommended Times for Checking and Consultation
1. At soil preparation (October)
2. When seeding outside for transplants (beginning of November)
3. When cutting back the stand for the first time (April)
4. When planting cuttings (April)
5. At transplanting cuttings (October)
6. At chemical weed control (before the vegetative period, at the end of March)
7. At drying (immediately after harvest).
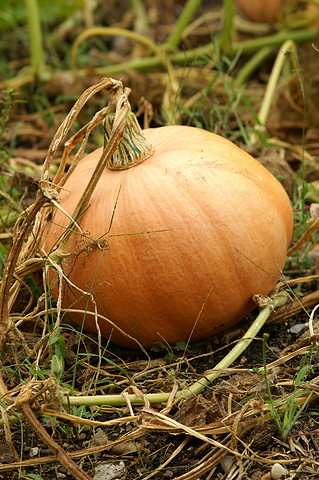
Cultivation of Styrian pumpkin (Cucurbita pepo var. Styriaca)
 The fatty oil extracted from the ripe seeds of Styrian pumpkin is an excellent remedy for various inflammations and prostate disorders, while also slowing down the development of arteriosclerosis. Due to its high vitamin E content, it is also used as a roborant.
Styrian pumpkin belongs to the gourds family (Cucurbitaceae).
Styrian pumpkin is an annual herbaceous plant with an extensive tap root system. Its large, smooth edged leaves are five lobed and vivid green, sometimes variegated. The plant has hollow, densely hairy vines that spread as wide as 4-5 m. Styrian pumpkin is monoecious; its unisexual, funnelform, gamopetalous flowers are large and vivid yellow. The staminate flowers have long peduncles whereas the pistillate flowers have short ones. Styrian pumpkin is xenogamous (cross pollinated), pollinated by insects. Its fruit is a pepo, it is round and striped, its average weight varies between 2200 – 2800 g. The olive green seeds are flat and oval, 15-20 mm long, 8-10 mm wide. Each pepo fruit contains about 400-500 seeds.
Thousand grain weight: 220-310 g.
Vegetation period: 120-150 days.
Environmental Requirements
Styrian pumpkin is a long day plant with a high nutrient demand that prefers a warm climate and thrives in the full sun. Seeds start to germinate at 12-15 oC, optimum temperature for germination is 25-30 oC. Styrian pumpkin tolerates draught but needs lots of water for proper development. It should be grown in rich, alkaline soils that warm up easily, such as medium textured humus loams, sandy loams or sandy soils.
Do not grow Styrian pumpkin in low lying, cold fields or in cohesive, acidic soils. The plant is very sensitive to herbicide residuals and its soil should also be free of chlorinated hydrocarbons. The concentration of residuals must not exceed 10 ppm.
 Forecrop
Grow Styrian pumpkin after cereals. It should be followed by row crops. Styrian pumpkin should not be preceded by other cucurbit plants (cucumber, pattypan squash, etc.) within 4-5 years as their pests and diseases are the same.
Styrian pumpkin, being cross pollinated, should be isolated from other pumpkin species (isolation distance: min. 1000 m) and other cucurbit plants (isolation distance: min. 500 m).
Soil Preparation
Plough at a depth of 30-35 cm in the autumn and consolidate the soil. In the spring, the seedbed should be prepared by shallow cultivation by combinators and dragging. Keep the fled weed free till sowing.
Fertilisation
Apply aged manure (30-40 t/ha), nitrogen (40-50 kg/ha), phosphorus (100-150 kg/ha P2O5) and potassium (120-160 kg/ha K2O) before the autumn ploughing, depending on the nutrient concentrations in the soil. Starter fertilisation (40-50 kg/ha N) is recommended in the spring.
Propagation
Styrian pumpkin is propagated by direct seeding. Sow treated seeds only.
Styrian pumpkin should be sown in the first half of May, when soil temperature has exceeded 13-15 oC. Late sowing compromises harvesting.
Sow seeds at a depth of 4-6 cm, at a row and plant distance of 100 and 50 cm, respectively, for trailing varieties. Optimum plant density is 12 000 – 13000 ha-1.
For bush varieties, row and plant distance are both 60 cm and optimum plant density is 17 000 – 20 000 ha-1. Seed requirement for a hectare is 6-8 kg.
When using sowing machines, mix the seeds with talc for uniform sowing. After sowing, the soil should be compacted. Generally smooth rollers are used for the purpose.
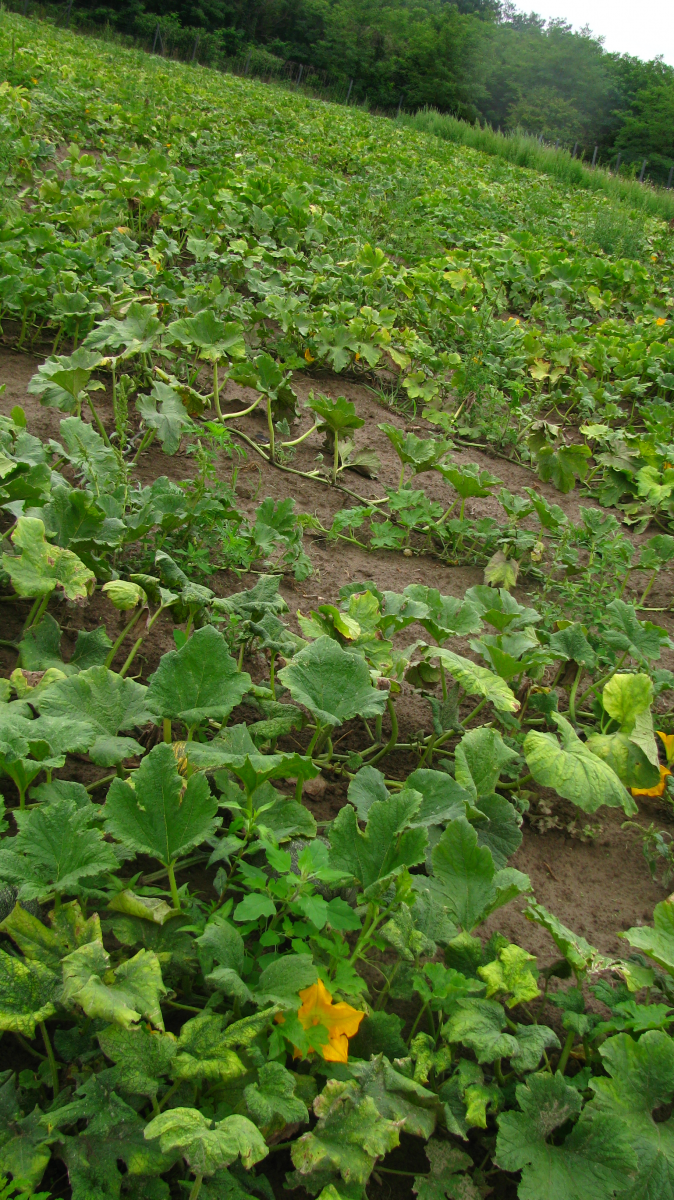
Plant care
Weed Management
Ø use 6.5 – 9.5 l/ha Flubalex (20% benefin) 7-8 days prior to sowing. Incorporate it into the soil immediately (post harvest interval for the active ingredient is 42 days, restricted entry interval is 0 days);
Ø as a post-sowing treatment, apply Dual Gold 960 EC (2 l/ha) or Dual Gold 960 EC + Maloran 50 WP for cohesive soils;
Ø as a post-emergence treatment, use mechanical weeding and thin the stand (when the seedlings have 3-4 true leaves);
Ø keep the field free of weeds by interrow cultivation and hoeing 2-4 times as necessary.
Irrigation
Styrian pumpkin is a draught tolerant plant but it yields better when irrigated in arid climate conditions. Deep furrow irrigation, once in June and again in July, is recommended, applying 40-60 mm of water at each occasion.
Promoting Pollination
To promote pollination, deploy 2-3 bee families per hectare around the field. It is useful to grow pumpkin in the neighbourhood of sunflowers as bees migrate from the wilting sunflower to the pumpkin.
Pest Control
Styrian pumpkin is relatively resistant.
Ø The spreading of the mosaic virus and the bacterium Erwinia tracheiphylla may be prevented by crop rotation, keeping isolation distances, removing infected plants and controlling aphids.
Ø Anthrachnose caused by Colletotrichum fungi and Cladosporium scab may be successfully treated by treating the seeds with Orthocid or Tachigaren 70 WP.
Ø Start preventive spraying against downy mildew (Pseudoperonospora cubensis) already when the seedlings have 4-6 true leaves. Use Rézoxiklorid 50 WP, Zineb 80, Cuprosan Super D, Dithane M-45 or Orthocid 50 WP in solutions of 0.2-0.3 %.
Maximum PHI for these pesticides is 21 days. Maximum residue limits vary between 2 and 10 mg/kg.
At the end of the vegetation period, apply 2-3 l/ha Bravo 500 or Daconil W-75 when necessary, as the PHI for these is relatively short (7 days).
Ø Spray against powdery mildew (Erysiphe cichoracearum) from the beginning of July. Any fungicide (Karathane LC., Afugan) against powdery mildews will provide satisfactory results.
Ø Control aphids with Pirimor 50 DP, Anthio 33 EC or Karate 5 EC.
Ø Against noctuid caterpillars and thrips, spray with Phosdrin, Dimecrol 50 or Fibol E.
In the flowering period, apply chemical treatment only when necessary. Use chemicals that are slightly toxic or non-toxic to bees only (Karate 5 EC or Pirimor 50 DP.
When combining insecticides and pesticides properly, 4-.5 spraying should be sufficient in a season.
Within the 30-day period prior to harvesting, do not apply chemical treatment to prevent the accumulations of residues.
Harvest
Styrian pumpkin should be harvested when the stems and peduncles have died, usually in the second half of September or the beginning of October.
Styrian pumpkin is usually harvested by hand but some elements of the process (e.g. collecting the fruits) may be facilitated by simple machines. Collected pumpkins should be field stacked for post-ripening and continuous processing. Pumpkins may be stored in stacks for 1-2 months. Stack healthy fruits only.
Expected yield (fruit): 50-80 t/ha.
Expected yield (seeds): 0.5-1.5 t/ha.
Processing
Pepo fruits should be cut manually (by „pumpkin chopper”), seeds then should be cleaned, thoroughly but gently, by hand or by mechanical seed extractors and seed washers. The cleaned seeds should be dried at 40-50 oC till their water content decreases to 8%.
When drying them, seeds should be turned by a wooden rake for uniform drying. As the batch is drying, the thickness of the seed layer may be increased by adding fresh seeds to the top.
Seed lots should be cleaned by wind sieves to remove empty hulls and fluff.
Use winnowing machines for post-cleaning after drying. During the whole process, special care is needed to protect the fragile seeds.

General Quality Criteria
Styrian pumpkin is not registered in the Eighth Hungarian Pharmacopoeia. Generally used quality criteria are listed below:
Ø Water content may not exceed 8%.
Ø The product may contain only the seeds of the same variety of Styrian pumpkin. It may not contain the flesh of the fruit.
Ø Seeds should be ripe, intact and free from off-odour or taste.
Ø The product must not contain live or dead insects, their residues or feces nor should it contain mouldy or infested seeds.
Ø Fatty oil content should be at least 40-60%.
Ø The product should contain the seeds of Styrian pumpkin in at least 99%.
Ø The rate of broken and dehulled seeds must not exceed 5%.
Recommended Times for Checking and Consultation
1. At the beginning of May, before weed control and sowing.
2. At the expected attack of downy mildew and/or powdery mildew, depending on the weather.
3. In the middle of September, to determine harvest date.
4. Before processing seeds.
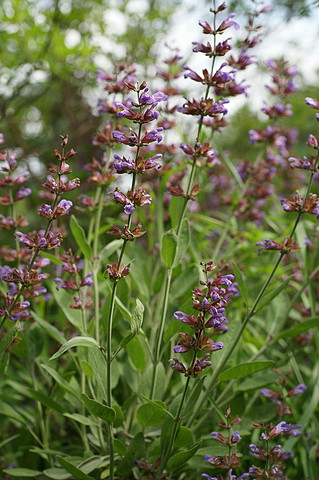
Cultivation of Garden sage (Salvia officinalis)
 Garden sage is a sub shrub growing to be 50-80 cm tall. It belongs to the mint family (Lamiaceae). Its densely branching roots penetrate deeply in the soil. The stem of older plants becomes woody and forms branches. Its lanceolate or elongated, silvery grey leaves are covered by soft hairs. The inflorescence is composed of distant whorls, the petals are violet, pink or white. Its fruit is a nutlet (carcerulus). Thousand grain mass: 7,5-7,8 g.
The active ingredient of garden sage is the essential oil mostly accumulating in the leaves. The most important components of the essential oil are thujone (30-60%), cymol (15%), camphor (8%) and borneol. The drug has anti-inflammatory, antiperspirant antidiarrhoeal and antibiotic properties; it is used in mouth and throat rinses and also as a herb.
Environmental Requirements
The draught tolerant garden sage prefers a warm climate. When the soil is not covered by snow in the winter, the stand is often killed fully or partially. It is successfully grown in most soils. However, do not grow garden sage in low lying, cold, wet fields or in clay soils. It is best grown on sunny slopes facing south, where the productive layer is thin and the soil is stony. Garden sage leaves the soil exploited. In productive years it requires medium doses of artificial fertiliser and it is useful to apply manure in the year of planting. It may be grown everywhere in Hungary but it gives the best yield in sheltered southern fields.
Forecrop
Garden sage stays in the field for 5-6 years, so it should be grown in areas outside the normal crop rotation regime. It is not sensitive to its forecrop and therefore it may be grown after any crop.
Soil Preparation
Once the forecrop has been harvested, the stubble should be broken. Keep cultivating the soil till autumn ploughing to kill weeds. Whether garden sage is propagated by direct seeding or transplanting, it will need a fine textured, smooth surface seedbed.
Fertilizing
When preparing the soil for planting, apply manure (20-30 t/ha). If the field does not receive manure, the application of phosphorus and potassium artificial fertilizers is recommended (60-80 kg/ha and 40-60 kg/ha, respectively). In productive years, garden sage requires regular applications of nitrogen, phosphorus and potassium fertilizers in medium doses.
Propagation
Garden sage may be propagated both by direct seeding and by transplants raised outdoors.
Direct seeding
Optimum sowing time is the end of October, beginning of November. Seeds should be sown at a depth of 3-4 cm and a row distance of 60-70 cm. About 15-20 kg seed is required per hectare. When not sown in the autumn, garden sage should be sown in the spring as early as possible.
Transplants
Seeds should be sown in April or May, in a well prepared seed bed outdoors, at a row distance of 20-25 cm. Seed density should be 30-40 g/m2. To raise transplants for a hectare, an area of about 300-400 m2 is required. Plants should be irrigated and weeded during the summer. Transplants reach a height of 15-20 cm by September, and then they can be planted by planter machine. Optimally, transplants are planted at the end of September, beginning of October, at a row and plant distance of 60-70 cm and 30-40 cm respectively.
As initial development is rather slow, it is safer to propagate garden sage by transplants in Hungary.
Plant Care
After transplanting, cut back the plants to 8-10 cm when they have reached a height of 15-20 cm. This way, vigorous shoot development will be promoted and garden sage will remain bushy.
In the first year, regular mechanical weed control (interrow cultivation) is essential. If garden sage is planted in the spring, apply Merkazin (2.5-3 kg/ha) two weeks prior to planting for chemical weed control. Whichever herbicide is used, it is best applied at least two weeks prior to planting. In the spring of the second and third years, use Merkazin again before the shoots emerge.
If the field is infested by monocots, Dual Gold 960 EC (1.6 l/ha) will provide efficient control, also when combined with other herbicides. Fusilade S (1.8-2.5 l/ha is equally efficient against monocots. From the autumn of the second year, Hungazin DT (3-4 kg/ha) and Geonter 80WP (1.5-2 kg/ha) may also be used, but only in autumn applications. Spray with Kerb 50WP (2.5-3 kg/ha) in the autumn against monocots.
Pest Control
In Hungary, no significant pests or diseases of garden sage have been recorded thus far. Severe frosts in snowless winters may kill the plant.
Harvest
The shoots of transplants planted in the autumn may be already cut once in the following year. Plants from direct seeding give yield only from the second year. Garden sage may be harvested twice, sometimes three times from the second year onwards. The first cut should be scheduled for the period before flowering (end of May, beginning of June), whereas the second and the potential third cut may be performed when the new shoots reach a height of 25-30 cm (end of July, or in the case of the third cut, beginning of October). In every case, shoots over the woody stem segments should be harvested. Garden sage grown in small fields may be harvested by sickle. In large scale cultivation, use a cutter loader.
When harvested for essential oil, garden sage is cut when fully in flower, in the noon hours when its essential oil content is the highest.
Processing
The harvested green mass may be dried naturally, in the shade, in a well ventilated room or spread out in the loft. For artificial drying, use an industrial grain dryer (drying temperature must not exceed 40 oC). For leaf drug, dried leaves should be removed from the stems.
For essential oil, harvested garden sage should be transported to the distillation plant immediately; otherwise its essential oil content will decrease. Shrinkage ratio is 4-5:1 i.e. 4-5 kg fresh plant material yields 1 kg dry material. If the stand was planted in the autumn, expected herba yield in the first year is 0.25-0.4 t/ha. Expected herba yield is 0.8-1.5 t/ha and expected folia (leaf drug) yield is 0.8-1 t/ha in the second and third years. Expected essential oil yield is 8-10 kg/ha.
The dry product may be stored in sacks or bale bags, in a clean, well ventilated room.
The essential oil is usually stored in metal vessels, cans or containers. Smaller volumes may be stored in glass vessels. Storing containers should be properly sealed and have dark walls.

General Quality Criteria
The European Pharmacopoeia defines the drug as the dried leaves or the essential oil of garden sage.
The drug should contain at least 1.5% essential oil. The leaf drug may contain a maximum 5% other plant parts and 1% of foreign material according to the European Pharmacopoeia.
The drug must not be musty or mouldy and it should be free from off-odour. The drug must not contain toxic or harmful plant parts. The drug must not contain live or dead insects, their larvae, feces or webbing, neither should it contain plant protection products or their residuals.
Recommended Times for Checking and Consultation
1. In the autumn, at the time of soil preparation, chemical wed control, sowing and planting.
2. Before the first cut (end of May, beginning of June).
3. At the second cut (July).

This project has been funded with support from the European Commission.
This publication [communication] reflects the views only of the author, and the Commission cannot be held responsible for any use which may be made of the information contained therein.

The project was funded by the European Commission. The views expressed in this publication (Communication) do not necessarily reflect those of the European Commission.


